Tag Archives: Tools Exclusively from HIC Harold Import Co.

Homemade Spaghetti Noodles Using Fante’s Cousin Arturo’s Pasta Pin

Contributed by Liana, of the Fante family of Philadelphia.

Fante's Cousin Arturo’s Pasta Pin in Use

Fante’s Cousin Arturo’s Pasta Pin in Use

Growing up, we made homemade spaghetti a couple of times a week with a pasta machine. In fact, my nonna had her machine set up on a table in her basement 24/7. That was her permanent pasta making station. After we were done rolling out and cutting the spaghetti, we brushed off the machine with a pastry brush and covered it with a homemade tea cozy until the next Sunday. Imagine that I thought we were totally normal! Doesn’t everyone have a pasta machine on its own altar in the basement? Apparently, not. But good news! You don’t need a pasta machine to make delicious homemade spaghetti.

Fante's Cousin Arturo’s Pasta Pin in Use

Fante’s Cousin Arturo’s Pasta Pin in Use

I’ve talked about our epic Sunday dinners before. Nonna’s favorite pasta, which she called “lasagna,” (but it wasn’t the layered cheese and sauce filled baked casserole we all think of with that name) was simple peasant pasta. We rolled out the sheets of dough, cut them down the center lengthwise, and then cut the pasta every two inches on a diagonal to make rough parallelograms. We boiled it in salted water and served it with fresh gravy, nothing fancy. It saved having to cut the fettuccine or spaghetti on the machine.

My mom talks about her nonna (my great-grandmother) making homemade spaghetti before pasta machines and chitarras (a stringed piece of equipment reminiscent of a guitar that you would press dough through the strings to cut). She rolled out the pasta dough with the handle of an old broom (her makeshift rolling pin) into a rectangular shape the width of the table. Then, she cut the dough into segments the length of spaghetti strands she wanted. Rolling up the segmented dough as though she were making a pinwheel dessert, she expertly sliced thin cross sections of dough with a sharp knife. If she were doing this to herbs it would be fancily called a “chiffonade.” Each cut made a single strand of spaghetti. Talk about a lot of work! (That’s why the peasant lasagna was so popular when making homemade pasta without a machine.) To ease cutting spaghetti without a machine, a clever craftsman created wooden rolling pins with grooves sharp enough to cut through dough for instant strands of spaghetti.

Fante's Cousin Arturo’s Pasta Pin in Use

Fante’s Cousin Arturo’s Pasta Pin in Use

Making homemade spaghetti by hand can be a great project for the family. Knead your favorite pasta dough recipe. Roll it out with a flat rolling pin into a rectangular shape about 1/16” thick and cut it to the desired length of your spaghetti with a knife. Make sure you have incorporated enough flour in your dough so that it is not sticky. The proper consistency will make the pasta much easier to cut and separate. Lightly flour the surface of the pasta dough. Apply even pressure on the pasta pin and roll it slowly down the length of your sheet of dough. If your pasta dough contains egg, the pasta pin will deeply score the dough and you will separate the strands by hand. (This is great fun for tiny fingers on the budding chefs in the kitchen!) To make separating strands easier, hold one hand and fingers on the main part of the dough and lightly pull on the single strand with the other hand to separate it from the pack. It goes very quickly once you get the hang of it (or delegate the job). If you make your pasta dough without egg, the spaghetti strands should separate easily just by rolling the pin across the dough. Cook and enjoy as you would your normal homemade spaghetti!

Fante’s Cousin Arturo’s Pasta Pin can be purchased from Fante’s Kitchenware Shop in Philadelphia, and on their website.

Find out how to place a wholesale order for any products from the Fante’s line, from Harold Import Co.

Autumn Apple Muffins

Autumn Apple Muffins

Autumn Apple Muffins

If you’re in the mood to bake using traditional fall flavors like apple and cinnamon, and are looking for an alternative to a traditional wheat flour based muffin recipe, these autumn apple muffins just might delight! The texture is soft and very moist, almost cake-like, and the flavor is apple-rich due to the high fruit to dough ratio. My first experience enjoying these was on the back porch of a friend’s home, eaten with a mug of hot cider and a view of the turning autumn leaves. Her baking experiments often include trying flour alternatives like coconut flour, almond meal, quinoa, and more, and I’m always intrigued and impressed at the delicious treats she creates. This apple muffin recipe is my favorite of hers, capturing some of the beauty and flavors of fall.

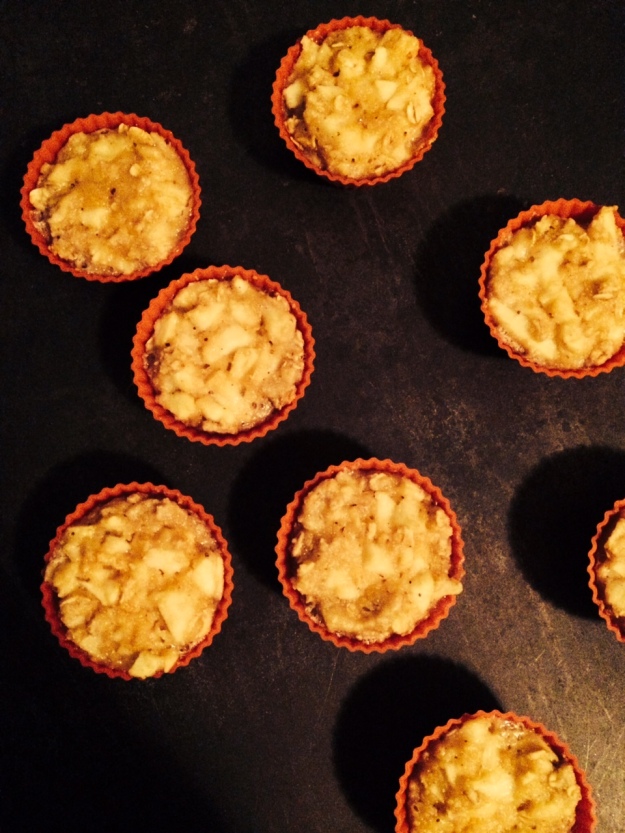
Apple Muffins in Mrs. Anderson's Baking Silicone Muffin Cups

Autumn Apple Muffins in Mrs. Anderson’s Baking Silicone Muffin Cups

Ingredients:

  • 1 ½ cups almond meal
  • ½ cup oats
  • 2 teaspoons cinnamon
  • ½ teaspoon sea salt
  • ½ teaspoon baking soda
  • ¼ cup honey
  • 3 eggs
  • 2 tablespoons olive oil
  • 1 large peeled and chopped tart apple

Kitchen Tools:

Instructions:

Preheat oven to 320. Line a muffin tin with paper or silicone baking cups.  Mrs. Anderson’s Baking® Silicone Muffin Cups are used and pictured in this recipe.

Peel, core, and chop 1 large apple, and set aside.

Peeling a large apple with The World's Greatest 3-in-1 Rotational Tri Peeleer

Peeling a large apple with The World’s Greatest 3-in-1 Rotational Tri Peeler

Place almond meal, oats, cinnamon, sea salt, and baking soda in a large bowl and mix until combined. Then add eggs, honey, and olive oil, and mix until combined but don’t beat. Next, fold in the chopped apples.

Chopped Apples

Chopped Apples

Fill each baking cup to the top, as they don’t rise as much as a muffin made with wheat flour.

Bake for 20 minutes. They’ll be a bit gooey at the tops until they cool. Makes about 1 Dozen Muffins.

Autumn Apple Muffins in Mrs. Anderson's Baking Silicone Baking Cups

Autumn Apple Muffins in Mrs. Anderson’s Baking Silicone Baking Cups

Contributed by Nicole Herman, of HIC.

The Wooden Rolling Pin: A Kitchen Classic

Rolling Pin Illustration

Classic Rolling Pin Illustration

Article Contributed by Laura Everage

Anyone who has spent any time in the kitchen will tell you that there certainly are essential tools to help you get through mealtime. If you’re an avid home cook, you’ll stock your kitchen with everything from sharp knives to well-seasoned cast iron cookware. And, if you’re a baker, you know that there is one tool that you just can live without . . . the rolling pin. In fact, the rolling pin is a tool that transcends both the cooking and baking genres, proving itself to be an indispensable tool for making sweet or savory pies, noodles, fondant, puff pastry, flatbreads and more.

There are rolling pins for all occasions and choosing the right one for a specific purpose is important. For most home cooks, a wooden rolling pin will prove the most versatile and serves best as an all-purpose rolling pin. Whether it is for preparing pastry for sweet or savory pies, flattening yeast-raised dough for pizza, making cut-out cookies, or cranking out udon noodles, the wooden rolling pin helps get the job done.

While professionals often choose a lightweight, handle-less wooden pin, such as a baker’s or French pin pictured below, most home bakers feel most comfortable with a heaver and handled wooden pin. The wooden rolling pin allows for easier flattening of dough, and the slightly larger barrel requires fewer revolutions, making the task easier.

Mrs. Anderson's Baking Rolling Pins from Harold Import Co.

Mrs. Anderson’s Baking Rolling Pins from Harold Import Co., made of hardwood in the USA.

Many of us have a hand-me-down wooden rolling pin in our kitchens. This pin has served its purpose well through the years, effectively and efficiently performing the task at hand. However, if you have yet to receive the hand-me-down pin from your mother, or are seeking to add a new one to your kitchen essentials toolbox, here are a few things to consider when purchasing a wooden rolling pin:

  • Wooden rolling pins can be made of various types of woods including maple, walnut and cherry. Each wood has distinctive properties, so choose a high quality wood to suit your needs. Strong and heavy, a hardwood is a great choice to resist abrasions through the years.
  • The desired length of a wooden rolling pin is with a 3-inch diameter of the barrel and can vary from 12-18 inches, with somewhere in between being one that suits most needs.
  • A good quality wooden rolling pin will last long enough to hand it down to the next generation. If possible, give it a roll in the store. It should easily roll, and give your knuckles ample room to move across the dough without knocking your knuckles on the dough or pastry board.

Quick Tips on Cleaning Wooden Rolling Pins:

  • Don’t leave a wooden rolling pin in water or the dishwasher – it may warp or crack, or cause damage to the bearings in the handle.
  • Wipe with a dry paper towel, then follow up with a damp cloth. If necessary, lightly use a scouring pad.
  • You don’t want to use soap because it may seep into the wood.

A Classic in the Kitchen

One of the classics of baking is making your own pie dough. While it may seem daunting for some, keep in mind it requires only a few ingredients (flour, Crisco, salt and water), and a little patience. When you have a classic kitchen tool such as the wooden rolling pin on hand, you’ll have it mastered in no time.

If you are wondering how to make a flawless, flaky pie crust, head on over to Family Eats to get a few tips on making the perfect pie crust.

Alligator Onion Peeler Makes Prepping French Onion Soup a Tearless Job

onion

Contributed by Laura Everage

The Egyptians buried them with the Pharaohs, The Greek used them to fortify athletes for the Olympic Games, and the world has been eating them raw, broiled, caramelized and deep-fried for more than 5,000.

The onion, is probably one of the most versatile vegetable. They come in yellow, red, and white varieties, small or large.

Generally, onions are peeled by hand and knife. It is a simple task, but a task that can cause a bit of frustration — and tears. There are many anecdotes to crying, and ways to make it easier.

How to articles and videos abound, espousing the best method to cut through those outside layers, suggesting to first place the onion in the fridge, in ice water, or even boiling water before peeling with a very sharp knife to minimize the damage to the skin, (and cut down on the release of all those tear-inducing enzymes).

For those who just struggle with the task, or who are peeling a lot of onions at a time, can enjoy the ease of using the Alligator Onion Peeler. A Swedish invention designed to peel the skin off of onions in a quick and efficient manner. (See the Alligator Onion Peeler video.)

Onion, Before Peeling, Perched on the Alligator Onion Peeler

Onion, Before Peeling, Perched on the Alligator Onion Peeler’s Spike

Alligator Onion Peeler

Onion, After First Layer of Skin is Removed From Passing Through The Alligator Onion Peeler’s First Set of Blades

Its razor sharp edges, skim away the layers of skin, leaving a perfectly skinned onion that is ready to be chopped, diced and prepared for use in everything from French onion soup, to a sweet onion potato salad or raw onions for a burger.

Alligator Onion Peeler

Peeled Onion, After Passing Through The Alligator Onion Peeler

Perfect for use with a variety of sized onions, the handy onion peeler is easy to use. Place the onion on the holder, with the root side down. Press down the central part of the tool until it comes in contact with the onion and check to see the knives are centrally located. Press down over the onion. Then, press the upper part slowly onto the oven for the final removal of the skin.

Be careful, as the blades are very sharp!

For a little inspiration, here is a Classic Onion Soup Recipe that will make you want to book your flight to France. In fact, I think I originally found it in an old Jacques Pepin cookbook.

Classic French Onion Soup 

French Onion Soup

French Onion Soup

Makes 6 servings

  • ½ lb. Emmenthaler cheese, grated
  • ½ lb Gruyere cheese, grated
  • 1 tablespoon unsalted butter
  • 2 tablespoons corn oil or vegetable oil
  • 1 ½ lbs. pounds yellow (brown-skin) onions, peeled and sliced thin
  • 10 cups homemade or good-quality chicken stock*
  • 1 to 2 cloves garlic, chopped
  • salt and freshly ground black pepper to taste
  • 1 loaf French Baguette bread, cut into 36 to 48 slices

In a large bowl, mix together the grated Emmenthaler and Gruyere cheeses; set aside.

In a large soup pot over medium-high heat, heat the butter and corn oil until hot but not smoking. Add the sliced onions and sauté, stirring frequently, for 10 to 12 minutes until they are nicely browned. When the onions are browned, add the chicken stock and garlic. Bring to a boil and cook, uncovered, at a gentle boil for 20 minutes. Remove from heat. Using a food mill, push the soup mixture through it into a large bowl or pan. Add salt and pepper to taste.

NOTE: At this point, the soup can be cooled to room temperature and refrigerated in an airtight container up to 2 days. To use, return to simmer before finishing soup with bread and cheese.

Preheat oven to 400 degrees F.

Arrange the baguette bread slices in one layer on a cookie sheet. Place in oven and bake, without turning, for approximately 8 to 10 minutes or until they are well-browned on both sides. Remove from oven.

Place 6 to 8 prepared bread slices in each onion soup bowl. Arrange the bowls on a large cookie sheet.

Turn the oven temperature up to 425 degrees F.

Sprinkle approximately 2 tablespoons of the combined grated cheeses on top of the bread slices in each bowl. Add the prepared onion soup by filling the bowls to the rim (if you need a little more liquid, add a little water to the soup in each of the bowls).

Sprinkle 1/2 cup of grated cheeses on top of the onion soup in each bowl, making sure that it not only covers the soup, but also touches the entire inside edge of each bowl, so that it will adhere to the edge as it melts during cooking.

Tip: For an onion soup not to collapse, the soup bowl has to be filled to the rim with the onion soup and the bread. The cheese layer should cover the whole surface, so it will stick to the sides and form a crust that holds its shape and doesn’t sink.

Set the cookie sheet containing the bowls of soup in the oven and cook for 30 minutes until the cheese is melted and browned. Remove from oven and serve immediately. If the top is not well browned after 30 minutes, place the bowls under the hot broiler of your oven for a few seconds before serving.

For a variation on this traditional recipe, Christina of Sweet Pea’s Kitchen shares her favorite French Onion Soup Recipe.

Laura Everage is a writer, editor, swimmer, yoga-lover, wife, and mother of four. Her days start very early in the morning, but thanks to her favorite beverage, coffee, she is able to start each day on a good note. Laura began her journey in all things food and beverage related nearly 20 years ago, as Managing Editor of The Gourmet Retailer. She continues to write about food, coffee, tea and kitchenware and is currently working on a book entitled Courage in a Cup: Women, Coffee and the Global Economy. Laura is also founder and editor of her own website, Family Eats, and is editorial director/partner of Coffee Universe.Her work has appeared in a variety of trade magazines as well as consumer publications Saveur and Consumers’ Digest. Laura’s knowledge of the industry has landed her appearances on both the Food Network and Fine Living Network. To contact Laura, email Laura@familyeats.net.

Cantaloupe and Blueberry Ice Pops

Cantaloupe and Blueberry Ice Pops

Cantaloupe and Blueberry Ice Pops

Temperatures are warming, days are at their longest, and with the bounty of fresh produce available at markets this time of year, we thought it would be fun to roll up our sleeves and make our very own frozen treats. We started experimenting with some less traditional ice pop flavors last summer, like watermelon and raspberry. Cantaloupe is at its peak now until September so we opted to make an ice pop with this sweet, water-rich fruit, throwing in plump fresh blueberries for a little texture. Cantaloupe and Blueberry Ice Pop Recipe First purée 3 cups of cut cantaloupe in a food processor (a blender could work too.)

Cantaloupe Puree

Cantaloupe Puree

Pour the purée into your ice pop mold, filling about 1/3 of the way (use any vessel you choose, but we found the volume in this recipe worked well with our set of 4 Ice Pop Molds.) Drop in a few blueberries. Then continue to pour the cantaloupe purée into the mold, followed by the addition of blueberries, alternating cantaloupe purée and blueberries until the mold is filled to within about 1/2 inch from the top lip (leaving room for the cap, and a little expansion of the contents as it freezes.)

Ice Pop Mold Filled with Cantaloupe and Blueberry Mixture

Ice Pop Mold Filled with Cantaloupe and Blueberry Mixture

Ingredients

Tools

Freeze for about 3 hours, or until firm. If you prefer more of a cantaloup blueberry slush, remove from the freezer after 1-2 hours, and enjoy!

Cantaloupe and Blueberry Ice Pop Fully Frozen

Cantaloupe and Blueberry Ice Pop Fully Frozen


Cantaloupe and Blueberry Slush

Cantaloupe and Blueberry Slush

Contributed by Nicole Herman of HIC, Harold Import Co.

Garlic Press Test from the Brooklyn Homemaker

Garlic Press Test with the Brooklyn Homemaker

Garlic Press Test with the Brooklyn Homemaker

Have you met Tux? He’s the author of a fabulous blog called Brooklyn Homemaker, coming in 4th place in the “Homies” blog awards! HUGE! He shares recipes, stories, and gives in-depth reviews of gadgets too.
In his latest post, Tux de-bunks the garlic press, putting models of all price points to the test.

Read the full post here.

We want to thank the Brooklyn Homemaker for including Fante’s Cousin Umberto’s Garlic Press, made by Harold Import Co., in this line-up of fine garlic presses. We are honored and humbled to be a part of your consideration set.

Want to find a Fante’s Cousin Umberto’s Garlic Press of your own? Check out Whisk of Brooklyn and Manhattan. Also found in fine kitchen shops nation wide.

Raw Vegetable Pasta

Veggie Pasta Made With The World's Greatest 3-in-1 Rotational Tri-Blade Peeler

Veggie Pasta Made With The World’s Greatest 3-in-1 Rotational Tri-Blade Peeler

Creating “pasta” made purely from raw vegetables started gaining momentum along with interest in raw food diets, and has grown in popularity as some seek out gluten-free, low-gluten, or low calorie alternatives to traditional pasta.

If you’re not familiar with raw veggie pasta, it is simply fresh, raw veggies like carrots, summer squash, (shown above) zucchini, as well as other vegetables, turned into strips or curls that resemble spaghetti shaped pasta noodles. There are some helpful tools available that turn these veggies into long spiral shaped pieces, and tools that leave the strips straight.

A great tool for making raw veggie pasta is a spiral slicer, such as the Benriner Cook Helper, if you are going for a curly veggie “noodle.” The Benriner is also a superb kitchen companion when creating a larger volume of veggie pasta, as it turns out a nice big pile of curled strips quickly.

A kitchen gadget that makes quick work of turning raw vegetables into veggie pasta strips, which might surprise you – the julienne peeler.  We put our very own 3-in-1 Rotational Tri-Blade Peeler to the veggie pasta making test…

First using the regular blade to remove the rough outer skin of a carrot…

The World's Greatest 3-in-1 Rotational Tri-Blade Peeler Removing Carrot Skin

The World’s Greatest 3-in-1 Rotational Tri-Blade Peeler Removing Carrot Skin

The World's Greatest 3-in-1 Rotational Tri-Blade Peeler Removing Carrot Skin

The World’s Greatest 3-in-1 Rotational Tri-Blade Peeler Removing Carrot Skin

Then turning the knob and flipping to the julienne blade to turn the inside of the carrot as well as a yellow crook neck summer squash  into a mound of vegetable pasta goodness.

The World's Greatest 3-in-1 Rotational Tri-Blade Peeler Julienne Blade Making Veggie Pasta

The World’s Greatest 3-in-1 Rotational Tri-Blade Peeler Julienne Blade Making Veggie Pasta

The World's Greatest 3-in-1 Rotational Tri-Blade Peeler Julienne Blade Making Summer Squash into Veggie Pasta

The World’s Greatest 3-in-1 Rotational Tri-Blade Peeler Julienne Blade Making Summer Squash into Veggie Pasta

Looking for the World’s Greatest 3-in-1 Rotational Tri-Blade Peeler? Find yours here and at fine gourmet kitchen shops nationwide.

Settings for regular peeling, soft veggies, and julienne peeling

Settings for regular peeling, soft veggies, and julienne peeling

Strips of Yellow Crook Neck Squash Turned into Veggie Pasta

Strips of Yellow Crook Neck Squash Turned into Veggie Pasta

What next? You can toss the strips into a skillet and warm them, plus top with the creamy sauce of your choice, like Alfredo, pesto, or marinara, for a warm “pasta’ dish. We kept ours simple, tossing the brightly colored carrot and yellow crook neck squash strips in 2 tbs. olive oil, ¼ cup apple cider vinegar, a twist of fresh ground pepper, and a few pinches of sea salt, for a chilled salad. Combine, and eat! Delicious.

Veggie Pasta Made with a Julienne Peeler

Veggie Pasta Made with a Julienne Peeler

Interested in HIC kitchenware for your restaurant or home? Contact Us.

Contributed by Nicole Herman, of HIC, Harold Import Co.

Oven to Table Bakeware: Sweet & Savory Served with Simplicity and Style

Oven To Table Serveware Filled with Sweet and Savory Delights

Oven To Table Bakeware Filled with Sweet and Savory Delights

The kitchen can be a hectic place, which is why I always turn to my favorite tools and cookware to help me get through the process. A key part of my collection is finding multipurpose items that not only save on the space (I’ve a small kitchen), save on time (I’m crunched for time), and add a bit of style to meal service (Why not impress the family with presentation, too?)

When most of us think of multifunctional kitchenware, we think of those small appliances that come with a plug. I use my food processor for everything from chopping vegetables to making dough. I use my electric pressure cooker for sautéing veggies, pressure-cooking beans and for making soup. I use my slow cooker for roasts, casseroles, and keeping mulled wine at perfect temperature for a party. And my professional-grade blender serves up everything from smoothies to freshly ground spices.

But, beyond the multifunctional electric appliances, my kitchen is filled with a few essential pieces of cookware and bakeware. In particular, one of my favorites is my oven-to-table ware — a white, porcelain, fluted baker.

Yes, it’s a basic baker, no bells and whistles, but it’s utility outshines many of my high-end plugged-in tools in the kitchen. The reason is simple: It cooks just about everything, saves me time, and is pretty stylish too.

One of the main benefits of using oven-to-table ware is its utility. One dish goes from freezer to fridge, and from oven (or microwave) to the table. Perfect for use all year round, these pieces are particularly handy during the holiday season, and  are ideal for everything from breakfast, lunch and dinner (Chicken Pot Pie), to appetizers, side dishes (Corn Bread, Wild Mushroom and Pecan Stuffing) and desserts (Parisian Apple Crisp).

My oven-to-table ware is perfect for hectic evenings, casual or formal parties, or for delicious appetizers for game-time. I often pre-make meals, and store them in the freezer until ready to use. If, by chance, there are leftovers, I slip the baker in the fridge, until we’re ready to eat again – when I reheat in the same piece, in either the oven or the microwave.

Another coveted benefit of using my oven-to-table ware is the idea of having fewer dishes to clean. One pot, from freezer to oven to table – is a welcomed choice especially in our home (we don’t have a dishwasher!) Made to last a lifetime, the porcelain oven to table bakers are easily cleaned by hand with soap and water, or in the dishwasher.

Oven-to-table ware comes in all shapes and sizes. It’s best to have several different sizes on hand – some can be single serve, others big enough for a party, and still others sized perfectly for those family one-pot meals.

As for styling, I opt for a classic white. Sure, matching patterned pieces are fun to have, but the classic white glaze with its decorative fluted edges takes me through the seasons, and looks great whenever, or wherever, I use it –  from casual everyday occasions to the formal dinner parties.

Here is one of my favorite meals to make in my oven-to-table baker: (you can find HIC’s Oven-To-Table Fine Porcelain Fluted Baker here)

Polenta Pie

An easy deep-dish pizza with a thick and crunchy cornmeal crust. It takes a total of 1 ¼ hours to prepare, most of which is the crust-baking time. The recipe yields 1, 10-inch pie, which serves four. We like to substitute our favorite vegetables, or those we have currently available. Also, at times we skip the tomato slices and add a bit of tomato sauce instead.

Polenta Pie in Oven to Table Bakeware from HIC

Polenta Pie in Oven to Table Bakeware from HIC

Crust:

  • 1 ½ cups coarse cornmeal
  • 1 tsp salt
  • 1 ½ cups cold water
  • 2 cups boiling water
  • a little olive oil

Filling:

  • 1 tbsp olive oil
  • 1 small onion, thinly sliced
  • ½ cup thinly sliced bell pepper
  • about 10 mushrooms, sliced
  • 1 small zucchini, thinly sliced
  • 5-6 medium cloves garlic, sliced
  • 2 tsp dried basil (or 2Tbsp minced fresh basil)
  • ½ tsp oregano
  • fresh black pepper
  • ¼ lb. mozzarella cheese, grated
  • 2 small – or 1 medium – ripe tomato(es), sliced

Combine cornmeal, salt, and cold water in a small bowl. Have the boiling water on the stove in a saucepan, and add the cornmeal mixture, whisking. Cook about 10 minutes over low heat, stirring frequently. It will get very thick. Remove from heat, and let cool until it can be handled.

Preheat oven to 275 degrees F. Oil a 10-inch pie pan or baker. Add the polenta, and use a spatula and wet hands to form it into a smooth, thick crust over the bottom and the sides of the pan. Brush the surface with olive oil, and bake uncovered for 45 minutes.

While the crust bakes, heat 1 tbsp olive oil in a medium-sized skillet. Add the onion, and sauté for 5-8 minutes, or until it begins to soften. Add bell pepper, mushrooms, and zucchini, and sauté until everything is tender. Stir in the garlic and herbs, and sauté just a few minutes more.

Turn up the oven to broiling temperature. Sprinkle half the cheese onto the bottom of the baked crust, then add the tomato slices. Spread the sautéed mixture over the tomatoes, and sprinkle the remaining cheese on top. Broil until brown (about 5 minutes), and serve hot.

Source: The New Moosewood Cookbook by Mollie Katzen

 Laura Everage is a writer, editor, swimmer, yoga-lover, wife, and mother of four. Her days start very early in the morning, but thanks to her favorite beverage, coffee, she is able to start each day on a good note. Laura began her journey in all things food and beverage related nearly 20 years ago, as Managing Editor of The Gourmet Retailer. She continues to write about food, coffee, tea and kitchenware and is currently working on a book entitled Courage in a Cup: Women, Coffee and the Global Economy. Laura is also founder and editor of her own website, Family Eats, and is editorial director/partner of Coffee Universe.Her work has appeared in a variety of trade magazines as well as consumer publications Saveur and Consumers’ Digest. Laura’s knowledge of the industry has landed her appearances on both the Food Network and Fine Living Network. To contact Laura, email Laura@familyeats.net.

Chefs of EaT: An Oyster Bar Put HIC’s Mortar & Pestle and French Beechwood Utensils to the Test

Our friends Tobias Hogan and Ethan Powell, the creative team of EaT: An Oyster Bar, in Portland, Oregon, have been busy making delicious winter drinks and dishes, a perfect welcome for their guests as they pop in to escape the chilly Northwest winter.

HIC's Marble Mortar & Pestle Used at EaT: An Oyster Bar to Crush Herbs

HIC’s Marble Mortar & Pestle Used at EaT: An Oyster Bar to Crush Herbs

They’ve been using HIC’s little mortar and pestle to crush herbs they use at the bar for some of their house made syrups. Here, Tobias crushed up green cardamom for a cranberry syrup to put in their drink called “A Long Bright Winter” made with the syrup, a little Combier orange liqueur, dash of orange bitters, topped with sparkling wine and an orange twist.

Braise of Rabbit with HIC's French Beechwood Spoon

Braise of Rabbit at EaT: An Oyster Bar with HIC’s French Beechwood Spoon

Here we have a braise of rabbit for a roulade Tobias is making as part of a dinner with R. Stuart Winery, a multi day process. HIC’s French Beechwood Spoons help scrape up the “suc” (juice) to create a “fond” (the tasty brown bits that build in your pan from cooking meat and vegetables) which builds complexity of flavor.

Learn more about Tobias and Ethan here, or say hello on their Facebook Page.

Interested in HIC kitchenware for your restaurant or home? Contact Us.

Contributed by Nicole H., of HIC, Harold Import Co.

Reindeer Cupcake Recipe Using HIC’s Cannonball Ice Ball Tray

Reindeer Cupcakes made with the Cannonball Ice Ball Tray

Reindeer Cupcakes made with HIC’s Cannonball Ice Ball Tray

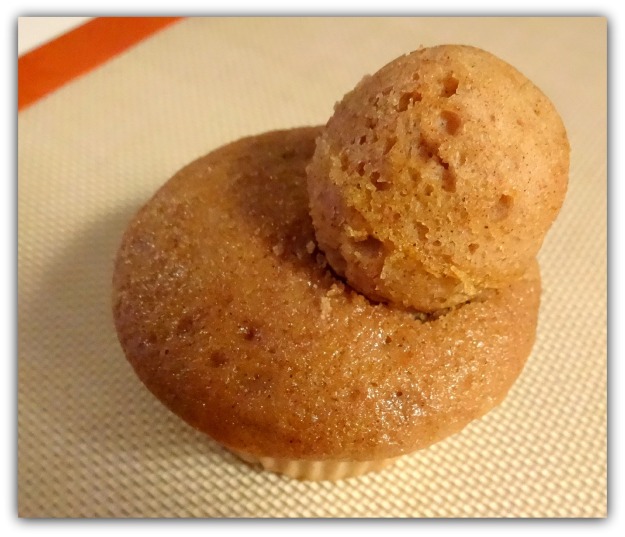
This holiday season we put our Cannonball Ice Ball Tray to the test, for baking as well as ice making… and feeling in a jolly mood, used it to make reindeer cupcakes.  (You could also create dog, cat, or bunny cupcakes… pretty much any animal with a head and body, just get creative with the decorations!) You can find a Cannonball Ice Ball Tray of your own, here, and in gourmet kitchen shops nationwide.

Reindeer Cupcakes Recipe:

First, prepare batter and fill both traditional cupcake cups (for the body)  and the Cannonball Ice Ball Tray for the reindeer heads.

See our Spice and Pumpkin Cake Batter recipe, and how to bake cake in the Cannonball Ice Ball Tray here. Or, you can use any flavor of cake you desire.

Assembling the reindeer cupcakes:

1. After cupcake cups and cake balls are completely cool, following the recipe found here, use a spoon to scoop a small amount of cake from the top, near the edge, of each cupcake. Create a small divot for the reindeer head to sit in.

Creating Divot for Reindeer Cupcake Head

Creating Divot for Reindeer Cupcake Head

2. Melt baking chocolate in a double boiler. We used Rose’s Silicone Baking Bowl.

Melting Chocolate in Rose's Silicone Baking Bowl

Melting Chocolate in Rose’s Silicone Baking Bowl.

3. Place the cake ball made in the Cannonball Ice Ball Tray into the divot, on top of the melted chocolate, and let cool. This will help hold the head nicely in place.

Reindeer Head on Cupcake Body

Reindeer Head on Cupcake Body

4. Decorate the face, as you choose. We used cinnamon imperials for the nose, dried currants for the eyes, and white icing for the feet and base of the eyes and nose.

5. Creating the antlers – put some melted dark baking chocolate from Rose’s Silicone Baking Bowl (find yours here) into a pastry bag fitted with a fine tip, and pipe the chocolate into antler shapes on a Silpat baking mat. Place in refrigerator to cool.

Reindeer Antlers Piped on Silpat Baking Mat

Reindeer Antlers Piped on Silpat Baking Mat

6. Press the base of each antler into the cupcake behind the reindeer’s head.

Reindeer Cupcakes Made with the Cannonball Ice Ball Tray

Reindeer Cupcakes Made with the Cannonball Ice Ball Tray

Enjoy!

Interested in learning more about HIC, Harold Import Co.? Contact us here.

Contributed by Nicole H., of HIC, Harold Import Co.

Cannonball Ice Ball Tray Tested by The Ranting Chef

Cannonball Ice Ball Tray

Cannonball Ice Ball Tray

Pat Geyer, of Rantings of an Amateur Chef, puts HIC’s Cannonball Ice Ball Tray to the test. Pat conducts a melt test of a regular ice cube vs. a sphere shaped ice ball made in the Cannonball Ice Ball Tray, and captures the event with time-lapse photography. Read more

Pat embarks on frequent culinary adventures, kindly sharing his lessons and excitement with lucky fans. Check out his blog as he explores recipes, restaurants, gadgets and anything else related to cooking and eating.

Looking for a Cannonball Ice Ball Tray? Contact the HIC team, and we’ll help you out.

Roasted Brussels Sprouts with Truffle Oil

Roasted Brussels Sprouts with Truffle Oil

Roasted Brussels sprouts with truffle oil. Beechwood spoon, made in France, and Rose’s Perfect Pie Plate, both from HIC.

Brussels sprouts – The consistently controversial vegetable.  Most people fall into one of two camps here – you either love Brussels sprouts, or detest them. Whether it’s the smell, the texture, or the bad reputation they bear for being displeasing, many people just don’t embrace the Brussels sprout.  The technique used in this recipe was passed along from a good friend, who has converted many previously averse, to become embracers of the veggie. What’s different in this recipe? It’s all about changing the texture – We’ll roast both whole and sliced Brussels sprouts together, achieving a mix of softer whole sprouts, and crunchier sliced bits. Love pancetta and cheese? You’re covered. Just scroll down to the “Variations” section at the bottom of this post.

Roasted Brussels Sprouts with Truffle Oil Recipe

Ingredients

  • 1/2 pound Brussels sprouts, rinsed, ends trimmed, but left whole
  • 1/2 pound Brussels sprouts, rinsed, ends trimmmed, sliced
  • 2 tbsp. truffle oil
  • 1/2 tsp. Himalayan sea salt
  • Freshly ground black pepper

Tools

Step-by-Step Instructions

Preparing the Brussels sprouts

First, rinse well.

Brussels sprouts rinsed in collander

Brussels sprouts rinsed in collander

Trim the excess stem at the bottom.

Cutting Brussels Sprout Stem

Cutting the Brussels sprout stem

Then, pull the extra rougher leaves off from around the outside of the Brussels sprout.

Peeling Brussels Sprout Leaves

Peeling Brussels sprout leaves

Trim the stem a bit closer, and create a notch in the bottom. The notch aids in more even cooking.

Trim Brussels Sprout Stem Closely

Trim the Brussels sprout stem closely

Brussels Spout with notch cut into the bottom

Brussels spout with notch cut into the bottom

For this recipe we’re mixing both whole and sliced Brussels sprouts, because the smaller sliced pieces, as well as the bits that come off the sprout during the slicing process (don’t throw these out- put them in your roasting pan or pie plate) will become crunchier as they cook along side the whole sprouts, sopping up all of the truffle oil and collecting salt, adding savory flavor and variation in texture.

To prepare the sliced Brussels sprouts, first remove the stems and outside leaves, and cut the notch into the bottom. Then, cut in ¼-inch thick slices. We put The World’s Greatest™ Handy Dandy Super Slicer to work (To be notified when it’s available, Contact Us) which makes quick work of slicing any soft veggie or fruit in uniform widths, plus it locks in a closed position for drawer storage.  To note, if you have tough or very large Brussels sprouts, opt for a knife. The Handy Dandy Super Slicer works well if you have small, delicate sprouts. A Chef’s knife is also  a great choice.

Brussels Sprout in The World's Greatest Handy Dandy Super Slicer

Brussels sprout in The World’s Greatest Handy Dandy Super Slicer

Place both whole and sliced Brussels sprouts in a roasting pan or pie dish. In this recipe, we used Rose’s Perfect Pie Plate. Toss with 2 tbsp. truffle oil until the sprouts are well coated and sprinkle with 1/2 tsp. of Himalayan sea salt (you may prefer to add more to taste, after cooking) and a 1/2 tsp. or a few twists of fresh ground black pepper.

Brussels sprouts tossed with truffle oil and sea salt

Brussels sprouts tossed with truffle oil and sea salt

Brussels sprouts in Rose's Perfect Pie Plate, before roasting

Brussels sprouts in Rose’s Perfect Pie Plate, before roasting

Place the Brussels sprouts on the top rack of a 400-degree oven and cook for 20 minutes, then remove and stir so that the sprouts get coated with the truffle oil and salt that has migrated to the bottom of the pie plate. Put back in the 400 degree oven and cook for another 15 minutes, or until sprouts are browned. Note, the smaller pieces may brown more and have crunchier edges than the whole Brussels sprouts. The two compliment each other nicely.

Roasted brussels sprouts with truffle oil and sea salt

Roasted Brussels sprouts with truffle oil and sea salt

Variations:

If you’d like to mix it up, here are a couple variations I’ve tried.

Use plain olive oil if you or your guests are not fond of truffles.

Toss in pancetta with the Brussels sprouts at the time roasting begins. This imparts a delicious flavor, and fills the kitchen with a wonderful aroma of cooking bacon.

Add nuts during the last 5 minutes of cooking. Slivered almonds, pine nuts, or pecans are all delicious, sprinkled on top.

Add a 1/2 cup of grated cheese, such as Grana Padano or Romano, 5 minutes before roasting time is up. Stir in, and roast for the remaining time.

Contributed by Nicole H., of HIC

Baked Squash with Anjou Pears

Baked Squash with Anjou Pears

Baked Squash with Anjou Pears

Baked squash with fresh picked Anjou pears – a perfect combination to welcome autumn’s arrival.

Winter squash is at it’s peak in markets around the country in late summer and early fall; this is the perfect time of year to incorporate this nutrient rich, delicious vegetable into your menu.  It can be incredibly versatile – perfect in sweet pies, savory side dishes, as a hearty salad topping, even used as a bowl for fall soups. We feature the winter squash varietal known as carnival squash in this post, beautifully colored in shades of gold, orange, and green, eye catching with it’s stripes and spots.  The meat inside is yellow and sweet, tasting a bit buttery and nutty when cooked. When picking out a winter squash, look for one free of moldy spots, and a hard, not tender skin.

Carnival Squash and Anjou Pear

Autumn’s Bounty – Carnival Squash and Anjou Pear

While perusing a local farmer’s market, we picked up fresh Anjou pears too – sweet, with a firmer texture than a Bartlett, which makes them a superior choice for cooking.

Baked Squash with Anjou Pear Recipe

Ingredients

1 carnival squash
3 Tbls butter
3 Tbls brown sugar
1 Anjou pear

Tools

Silpat baking mat (optional, but ideal for easily transferring baked squash wreaths to serving dishes)
Baking pan
Small pitcher to drizzle melted butter
Knife
Hard edged scraper or spatuala to remove squash seeds and distribute brown sugar

Step-by-Step Instructions

carnivalsquash

Carnival Squash

Remove top and bottom ½ inch from carnival squash. Slice remaining squash horizontally, into 3/4 inch thick slices. Remove seeds with a hard edge scraper. Place on baking sheet; using a Silpat mat is ideal to enable the squash wreaths to lift easily after baking, but you can make this dish without as Silpat too.
CarnivalSquashSliced

Sliced Carnival Squash on Silpat Baking Mat, Seeds Removed with Silicone Scraper Pictured

Slice and remove the core and seeds from the Anjou pear. Chop remaining slices into 1 inch pieces.

Carnival Squash Rounds Filled with Anjou Pear

Carnival Squash Rounds Filled with Anjou Pear

Fill each carnival squash rounds with chopped pear, and sprinkle with brown sugar.

Brown Sugar Adds a Touch of Sweetness to Anjou Pear Filled Carnival Squash

Brown Sugar Adds a Touch of Sweetness to Anjou Pear Filled Carnival Squash

Drizzle melted butter over the top.

Pour Butter over Squash and Pear Wreaths

Pour Butter over Squash and Pear Wreaths

Please in oven at 350 degrees, for 40 minutes. Serve!

Ideally, use a wide, flat spatula to transfer the squash wreaths to serving plates. 

Carnival Squash and Anjou Pear Wreaths

Carnival Squash and Anjou Pear Wreaths

Contributed by Nicole H., of HIC

Homemade Cavatelli from The Ranting Chef

Fante's Cousin Elisa's Cavatelli Maker

Fante’s Cousin Elisa’s Cavatelli Maker

Heard the Rantings of an Amateur Chef? This is the blog of Pat Geyer, who embarks on frequent culinary adventures, kindly sharing his lessons and excitement with lucky fans. We wanted to share his recent homemade cavatelli quest with you here at The Useful Tool. Pat put our Fante’s Cousin Elisa’s Cavatelli Maker to the test (made in partnership with the Fante family of Philadelphia) teaching readers how to turn out beautiful shell-shaped cavatelli pasta noodles. If you’ve ever wanted to learn how to make homemade cavatelli, Pat has you covered.

Cacao, Almond Milk, and Banana Ice Cream – A Rich Chocolate Summer Delight

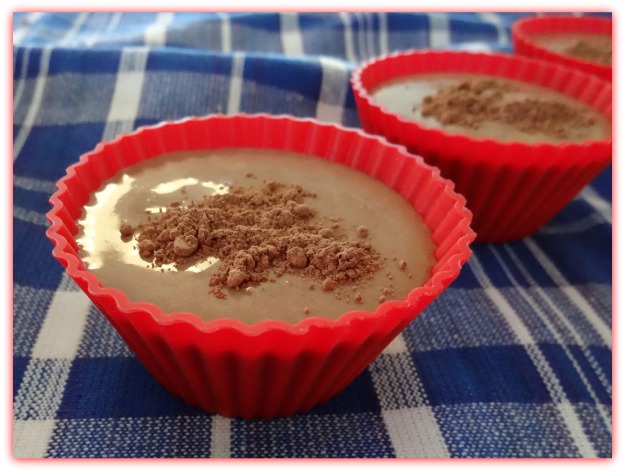
Cacao, Almond Milk, and Banana Ice Cream

Cacao, Almond Milk, and Banana Ice Cream

With summer in full swing, a cool treat is always appreciated. We explored venturing beyond our traditional ice cream recipes, and pulled in a few nutritious ingredients to make this rich, chocolatey cacao, almond milk, and banana ice cream.

Cacao Ice Cream Recipe

Cacao Ice Cream Recipe

Cacao, Raw Almond Milk, and Banana Ice Cream Recipe 

Cacao Powder

Cacao Powder

This recipe produces an “ice cream” with an incredibly rich, dark chocolate flavor imparted by the cacao powder, and has a creamy mouthfeel from the homemade almond milk. (You could use store bought almond milk, but the flavor and texture will be a little different.)

Any sweetener of choice can be used in this recipe, but we found that honey and agave nectar both pair well with the rich tasting cacao.

This ice cream was made using a blender and frozen bananas, which is great if you want to get this dessert on the table quickly. If you have an ice cream maker you could first blend all ingredients at room temperature, then  transfer to an ice cream maker to freeze.

Cacao Powder

Cacao Powder

Ingredients:

  • 2 heaping Tbsp Cacao Powder
  • 2 Tbsp Raw Honey or Agave Nectar (or stevia for the sugar sensitive)
  • 1/3 cup cold Homemade Almond Milk using raw almonds (see our recipe here)
  • 2 large frozen bananas (break in 1-inch pieces before freezing)

Tools:

Mrs. Anderson's Baking Silicone Baking Cups and Royal Blue Box Plaid Kitchen Towel

Mrs. Anderson’s Baking Silicone Baking Cups and Royal Blue Box Plaid Kitchen Towel Available from HIC

Place almond milk, cacao powder, and honey or agave in blender and pulse to start mixing slowly. Turning on high power without slowly mixing the cacao powder into the liquid first can cause it to shoot upwards in a cloud of cocoa dust. After almond milk, cacao powder, and honey are mixed gently, increase speed for a few seconds and mix well. Add frozen banana pieces, and pulse to get them moving. Then blend on high until the banana chunks smooth out and an ice cream consistency results. Serve at once, and sprinkle with additional cacao powder if desired. The deep chocolate taste is downright decadent.

*Hot weather tip: If you’re in an especially warm climate, or warm kitchen, ice cream can start to melt quickly after served. Try pouring into chilled ice cream cups (store them in the freezer) to help keep ice cream from melting quickly.

We appreciate our readers, and are interested in hearing more about your culinary adventures. Drop us a line and share what you’re experiencing! We’d love to hear your thoughts, anytime the mood strikes you. 

Contributed by Nicole Herman, of HIC.

Almond Milk Recipe – A Step By Step Guide to Homemade Raw Almond Milk

Homemade Raw Almond Milk

Homemade Raw Almond Milk

Homemade almond milk is delicious, nutritious, and so easy to make.  You only need a few tools and two ingredients to make classic almond milk. The recipe shared in this post is from a wellness focused friend of mine, who showed me how to use it as a base for smoothies, to add moisture to baked goods, and on oatmeal. (And there are many other uses, including simply enjoying the almond milk’s simple goodness in a tall frosty glass.) The taste is mild, with a different creamier mouth feel and richer flavor than store bought varieties. Once you try homemade almond milk, you’ll see what a delight it is!

Almond milk can also be helpful for those who are lactose, soy, or gluten intolerant, as it doesn’t contain any lactose or casein, a milk protein that’s similar to gluten.

Almond Milk, the Finished Product

Almond Milk, the Finished Product

Almond Milk Recipe – Makes about 3 cups, using the 1 cup almond to 3 cups water ratio described below. If you prefer a thicker milk, you can also try 1 cup almond to 2 cups water ratio.

Homemade Almond Milk Recipe

Homemade Raw Almond Milk Recipe

Ingredients

  • 1 cup raw almonds, preferably organic
  • 2 cups water for soaking almonds
  • 3 cups water for making the nut milk
  • Optional extras: 2 tsp. cinnamon, and sweetener (1 tbsp. agave syrup, maple syrup, or honey are delicious)

Tools

Step by Step Almond Milk Instructions

Almonds Soaking

Almonds Soaking (overnight is ideal)

Soak almonds a minimum of 8 hours or overnight, so they are totally submerged. You’ll notice they plump as they absorb water. Note, the longer the almonds soak, the creamier the almond milk. They should feel soft when you pinch them, after soaking.

Almonds in HIC's Stainless Steel Mesh Strainer

Almonds in HIC’s Stainless Steel Mesh Strainer

Drain and rinse the almonds thoroughly under cool water using a mesh strainer, after removing them from their soak.

Blending Almonds

Blending Almonds – First Pulse, Then Blend At High Speed

Put the soaked almonds and 3 cups fresh water in a blender.  First pulse the blender, to get the almonds equally broken and prevent clumping. Then blend on high about 1-2 minutes, until the liquid inside is white and the almonds are broken into fine meal. In the picture here, the almonds were not fully blended yet, as you can see by the still large visible brown almond pieces.

Almond Milk Passing Through Stainless Mesh Strainer

Almond Milk Passing Through Stainless Mesh Stainless Strainer (this one pictured, made by HIC, Harold Import Co.)

Pour the almond mixture through a double mesh strainer or nut milk bag, set into a bowl placed below. Use your hand to press all the almond milk from the almond pulp that’s left in the strainer,  or if using a nut milk bag, lift the bag up out of the bowl and squeeze the liquid out of the remaining pulp.

Now is the time to sweeten if desired. Taste the almond milk first, as you might enjoy it just as-is, without sweetener. To add sweetener, rinse the blender and place the strained almond milk back into the blender, and add a tablespoon of honey, agave, or sweeter of choice, blend to mix through about 20 seconds, and taste. I’ve added 2 tsp. cinnamon and it adds a delicious flavor.

Finished Homemade Raw Almond Milk. A Bowl Full of Goodness

Finished Homemade Raw Almond Milk. A Bowl Full of Goodness (click photo to learn more about the porcelain bowl show here)

Fresh raw almond milk keeps in the refrigerator for about 3 days unless cooked to pasteurize.

Using the leftover almond meal collected in the basket of your strainer or nut milk bag: The leftover almond meal can be added to hot cereal, or baked goods as is. You can also spread it out on a Silpat baking mat, on top of a baking sheet and bake it in a low oven until completely dry, and then use in baked goods the same as you would with store bought almond flour.

Other ideas to put that leftover almond meal to use?

We liked this recipe for Raw Cookie Dough Bites from the Detoxinista.

Enjoy! Questions? We’d love to help! Just use the “Leave a reply” link at the top of this post, or drop us a line at info@haroldimport.com

Article Contributed by Nicole Herman, of HIC

Cannonball Ice Ball Tray Does Double Duty – Makes Perfect Round Ice Cubes and Delicious Cake Bites

HIC's Cocktail Ice Ball Tray

HIC’s Cannonball Ice Ball Tray

HIC, Harold Import Co.’s very own Cannonball Ice Ball Tray, previously known as the Cocktail Ice Ball Tray, was created to take care of the need for an ice cube that will dissolve more slowly, leaving your cocktail or any beverage, chilled but not diluted.  Not only does it achieve this goal, but makes a perfect cake pop or cake bite as well! We will show you how to make them step-by-step, below. The size of each cube – 1.5 inches in diameter, means you can use just one in a rocks or cocktail glass, or add many of these frozen spheres when filling an ice tea pitcher or large glass. The larger the piece of solid ice, the slower it will melt into your drink. To get yours, visit Fante’s Kitchen Shop. Coming soon, to fine kitchen retailers nationwide.

To make ice balls or spheres in the Cocktail Cannonball Ice Ball Tray: Fill the bottom portion (you can tell which is the top, because it has small pin holes to allow air to escape) with water, until it’s exactly halfway up to the top edge of the tray.

Cocktail Ice Ball Tray Fill Level for Making Spheres Shaped Ice Cubes

Cocktail Ice Ball Tray Fill Level for Making Spheres Shaped Ice Cubes

Press the top of the mold down until it fits snuggly against the base. Freeze.

Cocktail Ice Ball Tray Fully Filled and Closed, Ready for Freezing

Cocktail Ice Ball Tray Fully Filled and Closed, Ready for Freezing

To remove, run warm water over the outside of the mold for a few seconds. This melts any ice that could have formed between the ice cubes or spheres, so they can each pop out of the mold easily. Now, set the mold down, right side up, and pull the top half off the bottom. The cubes will be sitting in the bottom half of the mold, and will release easily.

Releasing the Sphere Shaped Ice Cubes from the Cocktail Ice Ball Tray

Releasing the Sphere Shaped Ice Cubes from the Cocktail Ice Ball Tray

Removing the Sphere Shaped Ice Cubes

Removing the Sphere Shaped Ice Cubes

Berry Infused Ice Balls Made With HIC's Cocktail Ice Ball Tray

Berry Infused Ice Balls Made With HIC’s Cocktail Ice Ball Tray

Creating berry filled ice balls to slowly infuse your drink with berry flavor is another way to use HIC’s Cannonball Ice Ball Tray. Simply crush fresh or previously frozen berries, such as blueberries, raspberries (shown here) or strawberries, and fill each each round in the bottom half of the tray with the crushed berries, heaping full. Crushing the berries and stuffing and filling each round until heaping full is important, so that the berry mixture is not completely sealed in a thick layer of ice, and will be able to make contact with your drink to allow infusion. Next, add water, and fill the bottom half of the tray until it’s exactly halfway up to the top edge of the tray (as illustrated above). Press the top of the mold down until it fits snuggly against the base. Freeze. Remove ice balls as illustrated above, and place in a glass of fresh water, tea, or juice. It will take a few minutes for the thin ice just covering the outer edges of the berry mixture to start to melt, and reveal the berry beneath. The berry juices will tint your beverage a lovely bright hue, as pictured, and add a subtle berry flavor.

The Cannonball Ice Ball Tray is made of silicone, measures 9.25″ x 3.75″ dishwasher safe, and heat safe up to 500 degrees.

Making Cake Bites or Cake Pops with the Cannonball Ice Ball Tray

Spice Cake Bites Dusted in Powdered Sugar made in HIC's Cocktail Ice Ball Tray

Spice Cake Bites Dusted in Powdered Sugar made in HIC’s Cocktail Ice Ball Tray

The Cannonball Ice Ball Tray serves double duty, not only to make ice balls or spheres, but also works brilliantly for cake bites or cake pops! Below we’ll share a really moist spice and pumpkin cake recipe, as well as a step-by-step guide to making cake bites in the HIC Cannonball Ice Ball Tray.

Spice and Pumpkin Cake Bites Recipe

Ingredients (Dry):

1/2 cup unsalted butter
2 1/4 cups all-purpose flour
2 teaspoons baking soda
1/4 teaspoon salt
Spices: 2 teaspoons cinnamon, 3/4 teaspoon ginger, 1/2 teaspoon nutmeg, and 1/4 teaspoon cloves)

(Wet)
1 whole large egg plus 2 yolks
1 1/2 cups sugar
¼ cup sour cream
1 can (15 ounces) pumpkin puree (not pumpkin pie filling)

Powdered Sugar for dusting

Mix flour, baking soda, salt, and spices. In a separate bowl, mix eggs (room temperature!) sugar, softened butter, sour cream, and pumpkin puree. Gently fold dry ingredients into wet.

How to achieve a super moist cake? Baking maven Rose Levy Beranbaum offers a wonderful tutorial.

Preheat oven to 325, and set the oven rack in the center of the oven.

Using the Cannonball Ice Ball Tray to make the cake bites:

Lightly butter the insides of the rounds of both halves of the tray. Try putting a little butter on a piece of a paper towel and rub the butter into the rounds. It might sound a odd, but doing it this way enables an even and light coating. To see how they would turn out differently, some of the cups in the tray were coated with butter and some with non-stick baking spray. Both popped out of the form equally well after baking.

Use a tablespoon to fill each round in the bottom piece of the mold precisely. You can tell which is the bottom, because it doesn’t have pinholes. The half with the pinholes will be placed on top, and the holes allow for steam or extra batter if overfilled, to escape during baking. Heap the tablespoon with batter, and then fill each hole flush. Go back to the mixing bowl with the spoon to get a bit more batter, and top off each hole so they are overfilled to the point of mounding about ¼ inch above flush, but not so much that it spreads onto the surrounding flat part of the silicone tray.

Press the top half of the mold down onto the bottom half, and squeeze the two together so they fit snugly. Place on a cookie sheet, and bake for 14 minutes. Remove from oven and let the mold sit unopened, cooling, for another 10 minutes.

Removing Cake Bites from the Cocktail Ice Ball Tray

Removing Cake Bites from the Cocktail Ice Ball Tray

Removing Cake Bites

Removing Cake Bites

To remove the cake bites, slowly pull the top half of the mold up off the bottom half. Use your finger to gently press down on the top of each peak in the mold, to release the cake bite if it seems hesitant to release. We found we needed to do this on a few, but others released on their own.

Once the top half of the mold is lifted off, hold the bottom half of the mold in your hands, and pop the cake bites out by pressing up on the bottom of each round to release them. Because these are made of cake batter, and not cake batter mixed with frosting as traditional cake pops are, they are softer and a bit more delicate (especially when still warm) so handle gently.

If you find a ridge around the circumference of the cake bite where the mold halves meet, it can be scraped off with a paring knife.

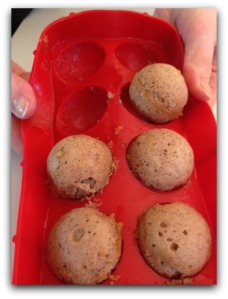
Baked Spice Cake Bites

Baked Spice Cake Bites

You can decorate with frosting, glazes, sprinkles, or simple powdered sugar. To achieve the look of the cake bites shown in this post, sprinkle powered sugar on a plate and roll still barely warm cake bites in the sugar until coated, and serve.

Dusting Spice Cake Bites in Powdered Sugar

Dusting Spice Cake Bites in Powdered Sugar

Spice Cake Bites Dusted in Powdered Sugar made in HIC's Cocktail Ice Ball Tray

Spice Cake Bites Dusted in Powdered Sugar made in HIC’s Cocktail Ice Ball Tray

Enjoy!

To clean the Cannonball Ice Ball Tray, wash in warm soapy water or pop in the dishwasher.

Article Contributed by Nicole H., of HIC

Cheese Spaetzle Recipe and Spaetzle Maker or “Hobel” Tips

Cheese Spaetzle or käsespätzle

Cheese Spaetzle or käsespätzle

Spätzle, as my Grandma Esther would spell it, loosely means “little sparrow” and gets it’s name from a time before kitchen tools like spaetzle makers, or “hobels” as they’re also known, were readily available. Historically it was shaped by hand with a spoon or knife and was thought to resemble small birds. Spaetzle is the base of many dishes in a cookbook my Grandma presented to me on my 16th birthday; A fantastic compilation of family photographs spanning 5 generations, rustic recipes laden with meat and starchy vegetables meant to feed a large farming family, ingredient lists calling for everything from goat’s milk to “Aunt Edna’s canned pears,” plenty of spaetzle, and clippings from newspapers and magazines that had significance to my Grandmother either culinary or personal. This book is a time capsule and I smile every time I go through it.

Spaetzle is traditionally used as a base for both sweet and savory dishes, soups, and one-dish meals, as it is in my family cookbook. It’s inexpensive, filling, and can be modified to please a variety of palates. I’ve attempted every recipe in Grandma’s cookbook including spaetzle with cherry sauce made with Grandma next to me, others like squash pie made along side my dad, and the one I’m sharing here – Käse or Light Cheese Spaetzle – I make for my family. Grandma Esther left a sweet message in the book, noting, “Dear Nee Nee, some of the dishes may not be so practical for modern times (Maybe she was thinking of the kidney pie? My ancestors didn’t waste a bit.) I hope you find a few that you can enjoy.” And I have. The flavor and texture of spaetzle is comforting, and brings warm feelings of nostalgia. It’s quick to whip together for guests, plus one batch of noodles can be topped a variety of ways to suit everyone around the table. I hope you might enjoy it too.

Grandma Esther’s käsespätzle or Spaetzle with Cheese Recipe

Spaetzle Ingredients

Spaetzle Ingredients

Spaetzle Ingredients (Makes 2 servings; Modified from original which served 10)

1/2 cup whole wheat flour (this imparts a nuttier, heartier texture)
1/2 cup plus 2 tablespoons all-purpose flour
1 teaspoon salt
1 teaspoon ground pepper
2 large eggs
1/4 cup milk

Spaetzle Dressing:
2 pats butter
½ cup grated cheese (my Grandmother used Emmentaler, a harder German cheese) Here is a great website with a guide to German cheeses, for your perusal.
Additional salt and pepper to season

Tools: Spaetzle Maker or Hobel. Visit HIC’s “Where to Buy” page to find one at a kitchen shop near you.

Directions:

Combine the flour, salt and pepper.

Dry Spaetzle Ingredients

Dry Spaetzle Ingredients

Wet Spaetzle Ingredients

Wet Spaetzle Ingredients

In a second bowl, whisk the eggs and then add in the milk.

Create a depression in the center of the flour mixture and pour in the wet ingredients. The flour should be added and blended gently and slowly, scraping from the sides of the bowl, until well combined.

Wet and Dry Spaetzle ingredients

Blend dry ingredients slowly into wet spaetzle ingredients

The dough should be thick but not ridged, like a stiff muffin batter. I find the dough is easiest to work with, when I refrigerate for 10 minutes before placing in the spaetzle maker or “Hobel.”

Bring a pot of lightly salted water to a boil, and then reduce to a simmer. Make sure the pot is wide enough to allow for the spaetzle maker to sit on top, if using this device. Place the spaetzle maker over the pot, and clip to one edge.

Spaetzle maker clipping to 4 quart pot

Spaetzle maker clipping to 4 quart pot

Fill the hopper with a ball of dough, filling it to the top. Slide the hopper across, and watch the dough fall through the holes, into the simmering pot below!

Moving dough through spaetzle maker

Moving dough through spaetzle maker

Do this in batches so you don’t get a thick layer of spaetzle accumulating, which can clump together. With this size recipe, and using a 4 quart pot, I found I don’t have to do batches, I can make all the spaetzle at once and there’s enough surface area on the top of the pot to deter clumping. This dough recipe fills the hoper of the spaetzle maker exactly once. You know the spaetzle is done, when it floats to the surface of the pot.

floating spaetzle

floating spaetzle

Stir it gently to prevent it from sticking. Remove the finished spaetzle noodles form the pot with a slotted spoon or dump the whole pot into a smooth surface colander (not a mesh strainer, I find it sticks to the mesh) and give it a light rinse of cold water.

Place the rinsed spaetzle into a bowl with sides high enough to permit tossing, and drop the 2 pats of butter on top. The heat of the spaetzle will melt the butter. Stir in. Sprinkle the cheese into the bowl as well, and stir to combine with the buttered spaetzle. Dish into smaller bowls, and add a little more salt and pepper to taste, if desired. (Or, more cheese on top.) Dig in!

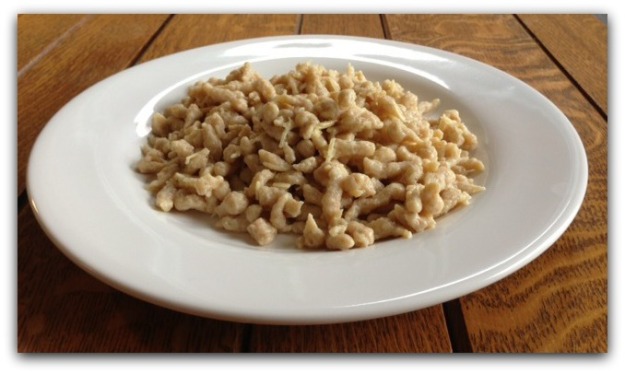
Cheese Spaetzle

Cheese Spaetzle

Article Contributed by Nicole H., of HIC