Contributed by Liana, of the Fante family of Philadelphia.
I love gnocchi. Okay, full disclosure: I am obsessed with gnocchi. If gnocchi is on the menu, I will be ordering it. I love any excuse to make it for my friends and family. (Who am I kidding? I make them for me and force myself to share.) My obsession is so infamous that the gnocchi board in our Fante’s line is named after me.
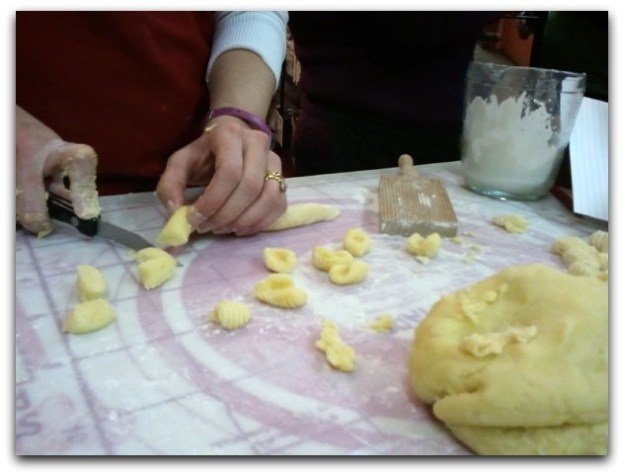
Thinking about making gnocchi with Nonna always makes me smile. Gravy would be bubbling on the stove because Nonna believed that gnocchi deserved fresh gravy. All of us cousins would pile around her kitchen table after church Sunday morning to roll out the dough into long, thin ropes. She would always cut the pieces (lest we be trusted with sharp objects), and then we would all roll our share on the gnocchi boards (she kept four of them in the house so we wouldn’t have to take turns and fight – hence not letting us use sharp objects!). We all had our own quirky method, each with its own distinctive look. As we ate the gnocchi that afternoon the conversation would be peppered with interruptions of, “I got Sandro’s” or “this one must be Elisa’s” and the like.

Cousin Liana’s Gnocchi Board from the Fante’s Collection of Italian Cookware Made by Harold Import Co.
Here is Nonna’s secret and some tips and recipes that she passed on to make your own gnocchi attempts a success!
THE SECRET: Everyone thinks I am crazy, but my Nonna (born and raised on a farm in northern Italy) used instant mashed potatoes to make her gnocchi. Shocking, I know. Guess what? She experimented for years, and ultimately settled on instant because they helped her to control the recipe. The amount of starch and water in each potato varies, so a gnocchi recipe is constantly changing based on that. As you may know from making pasta, the humidity changes make a difference in the amount of flour required as well. With all of these variables, achieving the perfect gnocchi is a tough task! Also, by using instant potatoes, you can make an incredibly dry potato mixture (using butter and milk), further reducing the amount of flour you need to use. The result? Gnocchi with intense potato flavor and a light, airy texture that melts in your mouth.
THE PRO TIP: Nonna never made gnocchi in the summer or when it was raining. I learned the hard way that it was because humidity wreaks havoc on gnocchi. I made them on a hot and humid July day for a party I was throwing, assuming I could simply adjust the flour as needed for a successful batch. It was truly a disaster. I had to run out and buy an extra 5 pounds of flour (which we used all of) to get the proper texture, and ended up with incredibly dense gnocchi. Nonna, I now understand why we had to wait until summer was over to have gnocchi, and I’m sorry for bothering you so much about it!
To all you purists out there, more power to you! I’ve included both her recipes below. Have fun with them! There are so many wonderful gnocchi variations, that once you have the basics down you can get creative.
Nonna’s Perfect Gnocchi
Serves 4
1 Cup milk
2 Tablespoons butter
1 ½ Cups Instant Potato Flakes
2 eggs
¾ Cup All-Purpose flour + more for sprinkling
In a small saucepan, melt the butter in the milk over low heat. Once the butter is melted, add the potato flakes while stirring. The result should be a very dry potato mixture that has a crumbly texture. Set aside to cool.
Once the potato mixture is cool enough to touch, combine the eggs, flour and potatoes. Knead until the dough is a homogenous color and texture. If the dough is too sticky, add a small amount of flour and knead together. Be careful not to add to much flour!
Making Gnocchi
Once the dough is formed, divide it into 4 pieces. Roll each piece into long ropes about 3/4 inches thick. Cut them into ¾ inch “dumplings,” dusting with flour as your go. Prepare your gnocchi board by sprinkling a little flour on it. Roll one at a time using your gnocchi board, adding more flour as needed to prevent sticking. To roll, simply press the side of your thumb into your “dumpling” creating a divet and use even pressure to push down. The result will be a half moon curl with ridges on the outside and a small pocket in the center.
Boil at least a 3 quart pot of water and salt to taste. Add 1/3 of the gnocchi to the boiling water, give a quick stir, and cover with the lid. When the water comes back to a boil (1-2 minutes) your gnocchi will be cooked perfectly. Skim them off the top of the water with a spider and then add your favorite sauce immediately. Repeat twice with the rest of the gnocchi. Enjoy!
Nonna’s Potato Gnocchi
Serves 6-7
5 Idaho Potatoes
2 Eggs
2 Tablespoons Butter (or Oil)
Pinch of Salt
All-Purpose Flour
Boil potatoes in water, then skin them and rice them into a pile while still hot. Make a similar, or slightly smaller, sized pile of sifted flour. Mix the riced potatoes and flour with the eggs and butter. Mix only until a paste is formed, but not too long, or the mixture will become too soft.
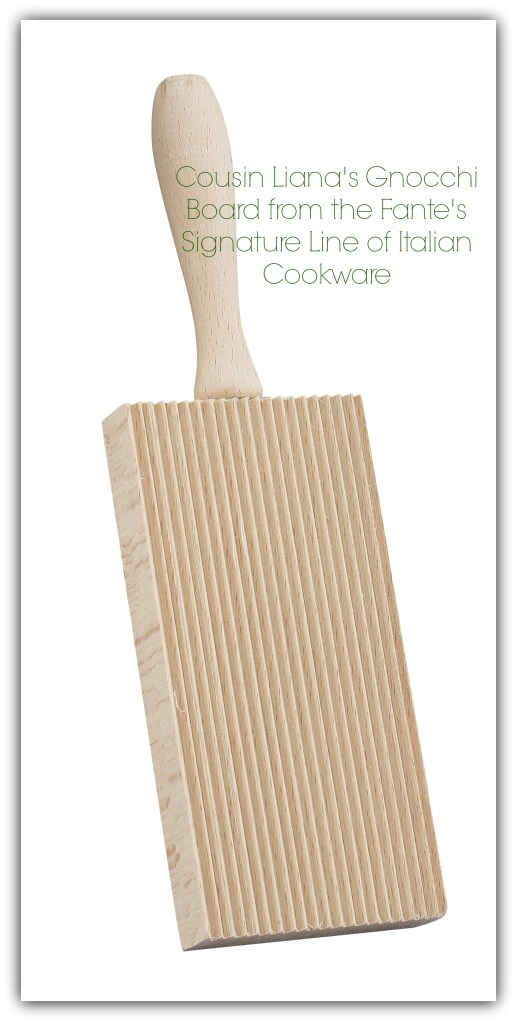
Cousin Liana’s Gnocchi Board from the Fante’s Signature Line of Italian Cookware from Harold Import Co.
Roll the dough into strips 1/2” to 3/4” in diameter, and cut them into 1” lengths. Roll Gnocchi on your gnocchi board, to create indentations that will permit better and quicker cooking.
Put Gnocchi into salted boiling water one at a time, to prevent their sticking together. Cook 5 to 10 minutes, according to desired taste. Serve with tomato or meat sauce.