Tag Archives: Laura Everage

The Wooden Rolling Pin: A Kitchen Classic

Rolling Pin Illustration

Classic Rolling Pin Illustration

Article Contributed by Laura Everage

Anyone who has spent any time in the kitchen will tell you that there certainly are essential tools to help you get through mealtime. If you’re an avid home cook, you’ll stock your kitchen with everything from sharp knives to well-seasoned cast iron cookware. And, if you’re a baker, you know that there is one tool that you just can live without . . . the rolling pin. In fact, the rolling pin is a tool that transcends both the cooking and baking genres, proving itself to be an indispensable tool for making sweet or savory pies, noodles, fondant, puff pastry, flatbreads and more.

There are rolling pins for all occasions and choosing the right one for a specific purpose is important. For most home cooks, a wooden rolling pin will prove the most versatile and serves best as an all-purpose rolling pin. Whether it is for preparing pastry for sweet or savory pies, flattening yeast-raised dough for pizza, making cut-out cookies, or cranking out udon noodles, the wooden rolling pin helps get the job done.

While professionals often choose a lightweight, handle-less wooden pin, such as a baker’s or French pin pictured below, most home bakers feel most comfortable with a heaver and handled wooden pin. The wooden rolling pin allows for easier flattening of dough, and the slightly larger barrel requires fewer revolutions, making the task easier.

Mrs. Anderson's Baking Rolling Pins from Harold Import Co.

Mrs. Anderson’s Baking Rolling Pins from Harold Import Co., made of hardwood in the USA.

Many of us have a hand-me-down wooden rolling pin in our kitchens. This pin has served its purpose well through the years, effectively and efficiently performing the task at hand. However, if you have yet to receive the hand-me-down pin from your mother, or are seeking to add a new one to your kitchen essentials toolbox, here are a few things to consider when purchasing a wooden rolling pin:

  • Wooden rolling pins can be made of various types of woods including maple, walnut and cherry. Each wood has distinctive properties, so choose a high quality wood to suit your needs. Strong and heavy, a hardwood is a great choice to resist abrasions through the years.
  • The desired length of a wooden rolling pin is with a 3-inch diameter of the barrel and can vary from 12-18 inches, with somewhere in between being one that suits most needs.
  • A good quality wooden rolling pin will last long enough to hand it down to the next generation. If possible, give it a roll in the store. It should easily roll, and give your knuckles ample room to move across the dough without knocking your knuckles on the dough or pastry board.

Quick Tips on Cleaning Wooden Rolling Pins:

  • Don’t leave a wooden rolling pin in water or the dishwasher – it may warp or crack, or cause damage to the bearings in the handle.
  • Wipe with a dry paper towel, then follow up with a damp cloth. If necessary, lightly use a scouring pad.
  • You don’t want to use soap because it may seep into the wood.

A Classic in the Kitchen

One of the classics of baking is making your own pie dough. While it may seem daunting for some, keep in mind it requires only a few ingredients (flour, Crisco, salt and water), and a little patience. When you have a classic kitchen tool such as the wooden rolling pin on hand, you’ll have it mastered in no time.

If you are wondering how to make a flawless, flaky pie crust, head on over to Family Eats to get a few tips on making the perfect pie crust.

Alligator Onion Peeler Makes Prepping French Onion Soup a Tearless Job

onion

Contributed by Laura Everage

The Egyptians buried them with the Pharaohs, The Greek used them to fortify athletes for the Olympic Games, and the world has been eating them raw, broiled, caramelized and deep-fried for more than 5,000.

The onion, is probably one of the most versatile vegetable. They come in yellow, red, and white varieties, small or large.

Generally, onions are peeled by hand and knife. It is a simple task, but a task that can cause a bit of frustration — and tears. There are many anecdotes to crying, and ways to make it easier.

How to articles and videos abound, espousing the best method to cut through those outside layers, suggesting to first place the onion in the fridge, in ice water, or even boiling water before peeling with a very sharp knife to minimize the damage to the skin, (and cut down on the release of all those tear-inducing enzymes).

For those who just struggle with the task, or who are peeling a lot of onions at a time, can enjoy the ease of using the Alligator Onion Peeler. A Swedish invention designed to peel the skin off of onions in a quick and efficient manner. (See the Alligator Onion Peeler video.)

Onion, Before Peeling, Perched on the Alligator Onion Peeler

Onion, Before Peeling, Perched on the Alligator Onion Peeler’s Spike

Alligator Onion Peeler

Onion, After First Layer of Skin is Removed From Passing Through The Alligator Onion Peeler’s First Set of Blades

Its razor sharp edges, skim away the layers of skin, leaving a perfectly skinned onion that is ready to be chopped, diced and prepared for use in everything from French onion soup, to a sweet onion potato salad or raw onions for a burger.

Alligator Onion Peeler

Peeled Onion, After Passing Through The Alligator Onion Peeler

Perfect for use with a variety of sized onions, the handy onion peeler is easy to use. Place the onion on the holder, with the root side down. Press down the central part of the tool until it comes in contact with the onion and check to see the knives are centrally located. Press down over the onion. Then, press the upper part slowly onto the oven for the final removal of the skin.

Be careful, as the blades are very sharp!

For a little inspiration, here is a Classic Onion Soup Recipe that will make you want to book your flight to France. In fact, I think I originally found it in an old Jacques Pepin cookbook.

Classic French Onion Soup 

French Onion Soup

French Onion Soup

Makes 6 servings

  • ½ lb. Emmenthaler cheese, grated
  • ½ lb Gruyere cheese, grated
  • 1 tablespoon unsalted butter
  • 2 tablespoons corn oil or vegetable oil
  • 1 ½ lbs. pounds yellow (brown-skin) onions, peeled and sliced thin
  • 10 cups homemade or good-quality chicken stock*
  • 1 to 2 cloves garlic, chopped
  • salt and freshly ground black pepper to taste
  • 1 loaf French Baguette bread, cut into 36 to 48 slices

In a large bowl, mix together the grated Emmenthaler and Gruyere cheeses; set aside.

In a large soup pot over medium-high heat, heat the butter and corn oil until hot but not smoking. Add the sliced onions and sauté, stirring frequently, for 10 to 12 minutes until they are nicely browned. When the onions are browned, add the chicken stock and garlic. Bring to a boil and cook, uncovered, at a gentle boil for 20 minutes. Remove from heat. Using a food mill, push the soup mixture through it into a large bowl or pan. Add salt and pepper to taste.

NOTE: At this point, the soup can be cooled to room temperature and refrigerated in an airtight container up to 2 days. To use, return to simmer before finishing soup with bread and cheese.

Preheat oven to 400 degrees F.

Arrange the baguette bread slices in one layer on a cookie sheet. Place in oven and bake, without turning, for approximately 8 to 10 minutes or until they are well-browned on both sides. Remove from oven.

Place 6 to 8 prepared bread slices in each onion soup bowl. Arrange the bowls on a large cookie sheet.

Turn the oven temperature up to 425 degrees F.

Sprinkle approximately 2 tablespoons of the combined grated cheeses on top of the bread slices in each bowl. Add the prepared onion soup by filling the bowls to the rim (if you need a little more liquid, add a little water to the soup in each of the bowls).

Sprinkle 1/2 cup of grated cheeses on top of the onion soup in each bowl, making sure that it not only covers the soup, but also touches the entire inside edge of each bowl, so that it will adhere to the edge as it melts during cooking.

Tip: For an onion soup not to collapse, the soup bowl has to be filled to the rim with the onion soup and the bread. The cheese layer should cover the whole surface, so it will stick to the sides and form a crust that holds its shape and doesn’t sink.

Set the cookie sheet containing the bowls of soup in the oven and cook for 30 minutes until the cheese is melted and browned. Remove from oven and serve immediately. If the top is not well browned after 30 minutes, place the bowls under the hot broiler of your oven for a few seconds before serving.

For a variation on this traditional recipe, Christina of Sweet Pea’s Kitchen shares her favorite French Onion Soup Recipe.

Laura Everage is a writer, editor, swimmer, yoga-lover, wife, and mother of four. Her days start very early in the morning, but thanks to her favorite beverage, coffee, she is able to start each day on a good note. Laura began her journey in all things food and beverage related nearly 20 years ago, as Managing Editor of The Gourmet Retailer. She continues to write about food, coffee, tea and kitchenware and is currently working on a book entitled Courage in a Cup: Women, Coffee and the Global Economy. Laura is also founder and editor of her own website, Family Eats, and is editorial director/partner of Coffee Universe.Her work has appeared in a variety of trade magazines as well as consumer publications Saveur and Consumers’ Digest. Laura’s knowledge of the industry has landed her appearances on both the Food Network and Fine Living Network. To contact Laura, email Laura@familyeats.net.

Oven to Table Bakeware: Sweet & Savory Served with Simplicity and Style

Oven To Table Serveware Filled with Sweet and Savory Delights

Oven To Table Bakeware Filled with Sweet and Savory Delights

The kitchen can be a hectic place, which is why I always turn to my favorite tools and cookware to help me get through the process. A key part of my collection is finding multipurpose items that not only save on the space (I’ve a small kitchen), save on time (I’m crunched for time), and add a bit of style to meal service (Why not impress the family with presentation, too?)

When most of us think of multifunctional kitchenware, we think of those small appliances that come with a plug. I use my food processor for everything from chopping vegetables to making dough. I use my electric pressure cooker for sautéing veggies, pressure-cooking beans and for making soup. I use my slow cooker for roasts, casseroles, and keeping mulled wine at perfect temperature for a party. And my professional-grade blender serves up everything from smoothies to freshly ground spices.

But, beyond the multifunctional electric appliances, my kitchen is filled with a few essential pieces of cookware and bakeware. In particular, one of my favorites is my oven-to-table ware — a white, porcelain, fluted baker.

Yes, it’s a basic baker, no bells and whistles, but it’s utility outshines many of my high-end plugged-in tools in the kitchen. The reason is simple: It cooks just about everything, saves me time, and is pretty stylish too.

One of the main benefits of using oven-to-table ware is its utility. One dish goes from freezer to fridge, and from oven (or microwave) to the table. Perfect for use all year round, these pieces are particularly handy during the holiday season, and  are ideal for everything from breakfast, lunch and dinner (Chicken Pot Pie), to appetizers, side dishes (Corn Bread, Wild Mushroom and Pecan Stuffing) and desserts (Parisian Apple Crisp).

My oven-to-table ware is perfect for hectic evenings, casual or formal parties, or for delicious appetizers for game-time. I often pre-make meals, and store them in the freezer until ready to use. If, by chance, there are leftovers, I slip the baker in the fridge, until we’re ready to eat again – when I reheat in the same piece, in either the oven or the microwave.

Another coveted benefit of using my oven-to-table ware is the idea of having fewer dishes to clean. One pot, from freezer to oven to table – is a welcomed choice especially in our home (we don’t have a dishwasher!) Made to last a lifetime, the porcelain oven to table bakers are easily cleaned by hand with soap and water, or in the dishwasher.

Oven-to-table ware comes in all shapes and sizes. It’s best to have several different sizes on hand – some can be single serve, others big enough for a party, and still others sized perfectly for those family one-pot meals.

As for styling, I opt for a classic white. Sure, matching patterned pieces are fun to have, but the classic white glaze with its decorative fluted edges takes me through the seasons, and looks great whenever, or wherever, I use it –  from casual everyday occasions to the formal dinner parties.

Here is one of my favorite meals to make in my oven-to-table baker: (you can find HIC’s Oven-To-Table Fine Porcelain Fluted Baker here)

Polenta Pie

An easy deep-dish pizza with a thick and crunchy cornmeal crust. It takes a total of 1 ¼ hours to prepare, most of which is the crust-baking time. The recipe yields 1, 10-inch pie, which serves four. We like to substitute our favorite vegetables, or those we have currently available. Also, at times we skip the tomato slices and add a bit of tomato sauce instead.

Polenta Pie in Oven to Table Bakeware from HIC

Polenta Pie in Oven to Table Bakeware from HIC

Crust:

  • 1 ½ cups coarse cornmeal
  • 1 tsp salt
  • 1 ½ cups cold water
  • 2 cups boiling water
  • a little olive oil

Filling:

  • 1 tbsp olive oil
  • 1 small onion, thinly sliced
  • ½ cup thinly sliced bell pepper
  • about 10 mushrooms, sliced
  • 1 small zucchini, thinly sliced
  • 5-6 medium cloves garlic, sliced
  • 2 tsp dried basil (or 2Tbsp minced fresh basil)
  • ½ tsp oregano
  • fresh black pepper
  • ¼ lb. mozzarella cheese, grated
  • 2 small – or 1 medium – ripe tomato(es), sliced

Combine cornmeal, salt, and cold water in a small bowl. Have the boiling water on the stove in a saucepan, and add the cornmeal mixture, whisking. Cook about 10 minutes over low heat, stirring frequently. It will get very thick. Remove from heat, and let cool until it can be handled.

Preheat oven to 275 degrees F. Oil a 10-inch pie pan or baker. Add the polenta, and use a spatula and wet hands to form it into a smooth, thick crust over the bottom and the sides of the pan. Brush the surface with olive oil, and bake uncovered for 45 minutes.

While the crust bakes, heat 1 tbsp olive oil in a medium-sized skillet. Add the onion, and sauté for 5-8 minutes, or until it begins to soften. Add bell pepper, mushrooms, and zucchini, and sauté until everything is tender. Stir in the garlic and herbs, and sauté just a few minutes more.

Turn up the oven to broiling temperature. Sprinkle half the cheese onto the bottom of the baked crust, then add the tomato slices. Spread the sautéed mixture over the tomatoes, and sprinkle the remaining cheese on top. Broil until brown (about 5 minutes), and serve hot.

Source: The New Moosewood Cookbook by Mollie Katzen

 Laura Everage is a writer, editor, swimmer, yoga-lover, wife, and mother of four. Her days start very early in the morning, but thanks to her favorite beverage, coffee, she is able to start each day on a good note. Laura began her journey in all things food and beverage related nearly 20 years ago, as Managing Editor of The Gourmet Retailer. She continues to write about food, coffee, tea and kitchenware and is currently working on a book entitled Courage in a Cup: Women, Coffee and the Global Economy. Laura is also founder and editor of her own website, Family Eats, and is editorial director/partner of Coffee Universe.Her work has appeared in a variety of trade magazines as well as consumer publications Saveur and Consumers’ Digest. Laura’s knowledge of the industry has landed her appearances on both the Food Network and Fine Living Network. To contact Laura, email Laura@familyeats.net.

The Pleasures of the Pomegranate and an Investigation of The Pomegranate Tool

Pomegranate Seeds
One of the first cultivated fruits, the pomegranate offers a unique, sweet-sour taste that is ideal for nibbling on alone or incorporating into cooling drinks, vegetable salads, tart stews, soups and desserts.

The pomegranate boasts high levels of antioxidants in the form of polyphenols, tannins and anthocyanins, all designed to help you stay healthy and strong by fighting those free radicals that can cause certain diseases – and premature aging.

But, getting to the heart of the pomegranate and those tiny seeds (called arils), which are the key to those antioxidants, can be a bit frustrating. The arils, which are surrounded by a shiny, tough, white membrane, can be hard to remove — and often quite messy, Working ones way though the ruby juice and seeds can be an act of devotion – an act that might cause one to throw up their hands and give up. But don’t give up on the delicious taste, versatility, and healthfulness of the pomegranate just because you think it is too much work.

It is often suggested to submerge a halved pomegranate in water in order to more easily remove the arils, and more importantly,  prevent splatter of the ruby red juices. But, I find this still a bit messy and also a bit cumbersome.

The new Pomegranate Tool is a quick, clean and easy way to remove those sometimes stubborn arils.

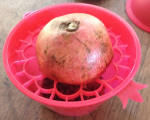
Here’s how it works: To start off, roll the pomegranate on the work surface to loosen and soften the fruit. Then remove the crown and cut the fruit in half. Place the halved pomegranate  face down in the grid, and cover it with the flexible dome, holding the dome tightly against the bowl.

Pomegranate Tool Pom Face Down

Winner of the Fruit Logistica Innovation Award

Pomegranate Tool Cover onPomegranate Tool With Spoon

To remove the seeds, strike the dome firmly, using a heavy spoon. (The arils will be deposited into the bowl beneath.) If any of the membrane breaks free, it can be easily picked out from the bowl of arils.

Pomegranate De-SeededPomegranate Arils

If desired, rinse the seeds first, and then enjoy.

The three-piece set, which includes the dome, grid and bowl, is easy to clean by hand or in the dishwasher.

Pomegranates are typically available in the fall and early winter. For maximum flavor, look for fruits that are rich in color and are heavy, as they will hold more juice. If, when pressed, powdery cloud puffs emerge from the crown, the fruit is most likely dry. You probably will eat them immediately, but if you must store them, keep them whole in the refrigerator for up to three months. The seeds, when stored in an airtight container in the freezer, can also be kept for three months. Find a Pomegranate Tool to take home, here.

See The Pomegranate Tool demonstration from the HIC booth, at the International Home + Housewares Show.

Versatile and Tasty These little gems are great on their own as a snack, tasty when added to yogurt or granola, and a sweet addition on top of ice cream or salads. They add texture, color and a burst of flavor to just about anything you add them to.

Here are a few suggestions on how to enjoy pomegranates:

  • Add some pomegranate juice to maple syrup
  • Add the arils to squash risotto
  • Reduce balsamic vinegar, spike it with a few tablespoons of  pomegranate juice and then drizzle over salmon
  • Create a sweet salsa with jalapeno, yellow pepper, rice vinegar and the pomegranate arils
  • Design a few ‘adult’ beverages including a Pomegranate Caipirinha or Pomegranate Cosmo
  • Incorporate the arils and juice into a delicious Pomegranate Yogurt Dip
  • Add a bit of acidity to a meat or fowl sauce

Once you’ve started eating them, it’s hard to get out of the pomegranate habit. And, the Pomegranate Tool is a handy way to help you enjoy all the flavor and goodness without the struggle.

Laura Everage is a writer, editor, swimmer, yoga-lover, wife, and mother of four. Her days start very early in the morning, but thanks to her favorite beverage, coffee, she is able to start each day on a good note. Laura began her journey in all things food and beverage related nearly 20 years ago, as Managing Editor of The Gourmet Retailer. She continues to write about food, coffee, tea and kitchenware and is currently working on a book entitled Courage in a Cup: Women, Coffee and the Global Economy. Laura is also founder and editor of her own website, Family Eats, and is editorial director/partner of Coffee Universe. Her work has appeared in a variety of trade magazines as well as consumer publications Saveur and Consumers’ Digest. Laura’s knowledge of the industry has landed her appearances on both the Food Network and Fine Living Network. To contact Laura, email Laura@familyeats.net.