
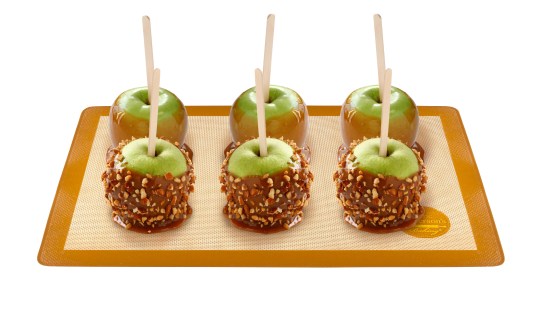
From homemade Caramel Apples to candy corn, the Halloween season is the perfect time for making delicious treats for family and friends. That’s why the Mrs. Anderson’s Baking U.S. Half Size Baking Mat is an essential tool for all your sweet-treat making.
Made from FDA-approved silicone and natural glass fibers, the mat is naturally non stick for quick release of foods and easy cleanup. When used for baking, the mat offers even heat transfer and requires no greasing or added oils. Durable and reusable for thousands of uses, the mat measures 11.625″x 16.5-” and fits standard 13 x 18″ baking sheets.
Caramel Apples
The caramel apple is believed to be ‘invented’ in the 1950s, and the treat became an instant hit for Halloween. Some of you may even remember receiving a caramel apple while trick-or-treating!
These days, you may not run across a house offering up caramel apples on Halloween, but it is still one of the most popular fall treats to make — and eat!
- 15 to 20 large Granny Smith apples
- Assorted chopped candies or nuts, for coating
- 1 (1-pound) box dark brown sugar
- 2 sticks unsalted butter
- 1 (14-ounce) can sweetened condensed milk
- 2/3 cup dark corn syrup
- 1/3 cup maple syrup
- 1 1/2 teaspoons pure vanilla extract
- 1 teaspoon molasses
- 1/4 teaspoon salt
Skewer the stem-end of the apples with popsicle sticks. Line 2 large rimmed baking sheets with wax paper. Place desired coatings in large shallow bowls.
In a heavy-bottomed saucepan, combine the sugar, butter, milk, corn syrup, maple syrup, vanilla, molasses and salt. Bring to a boil over medium heat. Boil until it registers 236 degrees F on a candy thermometer, about 10 minutes. Immediately pour the caramel into a heatproof bowl; let cool to 200 degrees F.
Dip the apples in the desired coatings. Transfer to the prepared baking sheets to set and let cool completely.
Source: http://www.foodnetwork.com/recipes/caramel-apples-1961196
Homemade Candy Corn
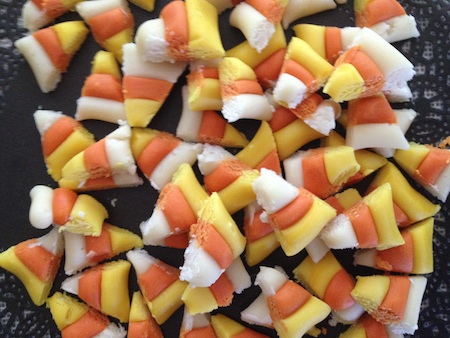
Even if you’re not a big candy corn fan, this one is definitely a keeper. Unlike store-bought candy corn, this leaves no strange, waxy aftertaste. Yes, it’s sugary, but you’re only eating it during Halloween season . . . unless you change the colors and create red, white and green candy corn for Christmas!
- 4-1/2 ounces powdered sugar, approximately 1-1/4 cups
- 1/2-ounce nonfat dry milk, approximately 6 1/2 teaspoons
- 1/4 teaspoon kosher salt
- 3-1/2 ounces granulated sugar, approximately 1/2 cup
- 3-3/4 ounces light corn syrup, approximately 1/3 cup
- 2-1/2 tablespoons water
- 2 tablespoons unsalted butter, room temperature
- 1/2 teaspoon vanilla extract
- 2 to 3 drops yellow and orange gel paste food coloring
Combine the powdered sugar, dry milk and salt in the bowl of a food processor. Pulse 4 to 5 times until the mixture is smooth and well combined. Set aside.
Combine the sugar, corn syrup and water in a 2-quart pot. Put over medium heat, cover and cook for 4 minutes. Add the butter, clip on a candy thermometer, and bring the mixture to 230 degrees F, about 1 to 2 minutes. When the sugar syrup reaches 230 degrees F, take the pot off the heat and remove the thermometer. Add the vanilla and the dry mixture, stirring continuously with a silicone spatula until well combined. Pour onto a half sheet pan lined with a silicone baking mat. Cool until the mixture is cool enough to handle, about 10 to 15 minutes.
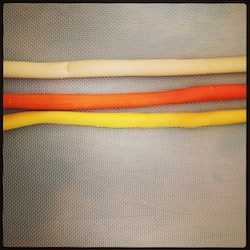
Divide the dough into 3 equal pieces. Add 2 drops of yellow food coloring to 1 piece and knead the dough until the color is consistent throughout. Add 2 drops of orange to the second piece, and knead until the color is consistent throughout. Leave the third piece white. Roll each piece of dough into a strand, about 18-inches long. Cut each strand in half.
The nonstick baking mat is perfect for making sticky Halloween candy
Roll 1 of the white pieces into a strand that is about 1/2-inch thick and about 22-inches long. Repeat with a yellow piece and orange piece. Lay the strands side by side and press them together using your fingers. Cut the strand into 4-inch pieces. Lay the strands, 1 at a time, onto the silicone mat and press into a wedge shape, like a triangle. Use a wire butter slicer to cut the candies into pieces. If you don’t have a wire butter slicer, use a knife, metal bench scraper or pizza cutter to slice the dough into small pieces. Repeat the procedure with remaining dough. Lay the finished pieces on a piece of parchment or waxed paper to dry for 1 hour. Store in an airtight container with parchment paper between each layer.
