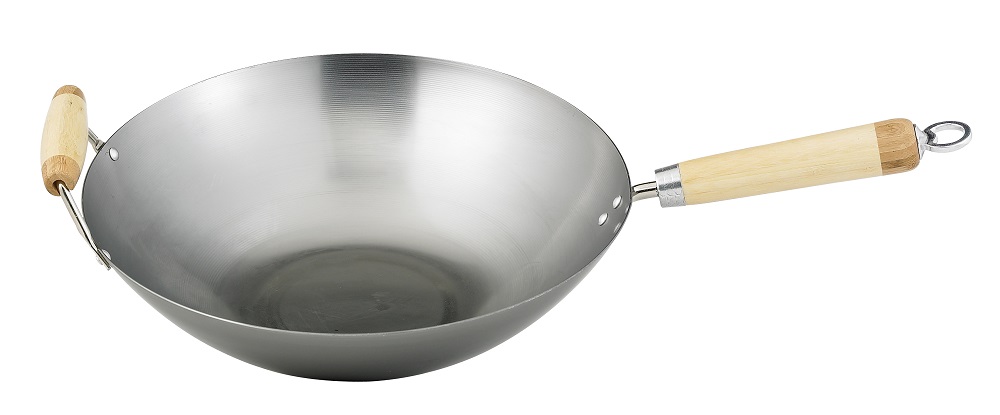
Tag Archives: Tools Exclusively from HIC Harold Import Co.

Carbon Steel Wok Meets Non-Stick Wok. An Interview with Helen Chen.

Non-Stick Wok

Non-Stick Wok

Carbon Steel Wok

Carbon Steel Wok

Article contributed by Nicole Herman, of HIC

Not once in the time that I’ve had the privilege of knowing renowned Asian Chef Helen Chen, have I engaged in conversation with her and walked away without wishing I’d captured her lesson on audio tape. The consummate educator, she’s candid, personable, speaking in a delightfully up-tempo, animated voice. I recently had the pleasure of talking with Helen a bit about her heritage, which is covered in the first part of this post, and discussing the pinnacle of her kitchen from childhood to present day — the quintessential wok. We address the question often asked, “Which is best? A carbon steel wok or a non-stick wok?”

Helen Chen with her mother, Joyce.

Helen Chen with her mother, Joyce.

Nicole Herman: Helen, your mother Joyce Chen was a well-known Asian chef, so you must have been exposed to a lot of great food and cooking equipment while you were growing up. Is that true?

Helen: Absolutely. In terms of food, when I wrote my first cookbook I made a list of all the dishes I remember my mother cooking at home. I came up with 100 dishes! In terms of being exposed to food, I was. My mother was a fabulous cook, mostly Chinese food. I can’t remember all 100 dishes now; many were specialties from Shanghai where she grew up, and Chinese comfort food, festival foods enjoyed during the dragon boat fest or Chinese New Year. Many times a year we had celebratory food.

Growing up we never had a round-bottom wok, mother didn’t believe in them because she felt it didn’t fit properly on the American stove even with the ring which is used to support the wok when  on a regular range, helping direct heat to the bottom of the wok and provide stability. Mother used a heavy duty pressure cooker pot. This way there were no hot spots; high sides enable stirring without food falling out. Thinking about the traditional Chinese kitchen, it tends to be a spartan place. Mother used the pressure cooker pot and wooden spoons. She wanted a round edge to get into the pan corners and she liked cooking to be quiet. Good knives, both Chinese style and western style, and chopsticks were also important. She used bamboo chopsticks in cooking, for stirring and picking up pieces. Gadgets were at a minimum as not many were on the market. This was in the 50’s – the pressure cooker was aluminum, as I recall. We were living in Cambridge at this time, where I grew up.

Helen's Mother's Wooden Spoon.

Helen’s Mother’s Wooden Spoon.

N: What cookware and gadgets were essentials for your mom, and are they the same products that are essentials for you?

Helen: Mom was the first person to develop a flat-bottom wok, which is my number one go-to tool still today. In China, they had a stove with a hole and the round-bottom wok sat in the hole, with the base close to the heat source. Since we had flat stoves in the US, mother developed a wok for this type of stove. Today it’s called a stir fry pan. In the early days no one understood it because they hadn’t seen one. They thought woks had a round-bottom. It took years to educate people on the benefits of a flat-bottom wok.

N: What are the benefits of a flat-bottom wok?

Helen: A Flat-bottom fits securely on a burner; it’s safer, and more stable. Mother added a skillet type handle instead of the two short wire handles that were common on the round-bottom wok; the latter was impractical as it meant you needed two hands to pick it up, and another person to help you get ingredients out.

Everyone now understands the importance of a flat-bottom wok. In China today, more people use propane and have stoves with flat burners in urban areas and most people there also now use a flat-bottom wok instead of the round-bottom style.

With the Helen’s Asian Kitchen line, we have taken the flat-bottom wok design and made it into a quality piece- added nonstick coating, made with a carbon steel of a heavier gauge, the handles are riveted and not just spot welded. We have good pricing and higher quality. It stems from the original design from my mom, but higher quality.

N: What piece of cookware or kitchen gadget has been the most helpful for you, or made a dish you make easier to create?

Helen: The flat-bottom 14” wok or the 12” stir fry pan.

N: Given today’s modern cookware and gadgets, do you find that creating great Asian cuisine is any easier for the home chef than it would have been, say, 50 years ago?

Helen: Yes. Better equipment has made the preparation easier. A good peeler that’s sharp and doesn’t cut into your hand helps, a good garlic press helps, I find there’s more comfort in today’s tools. Better materials and better designs are safer, easier, and easier to clean. Some of the mandolines out of Japan are very useful for julienne ingredients.

N: Many home chefs enjoy stir fry, but may be intimidated by the idea of using a wok at home. Do you have words of advice to ease the mind of a timid first time wok user or potential purchaser?

Helen: In general, everyone should use a flat-bottom wok or stir fry pan. Don’t bother with a round-bottom unless you have a high end stove with a wok ring built in. For most people, a flat-bottom is best. Look for one with a nice weight. Cast iron conducts heat well, but it’s heavy and hard to move and pick up. Also cast iron isn’t ideal for stir frying because it isn’t responsive to heat changes; it holds heat a long time.

N: What’s the difference between an uncoated carbon steel wok and a non-stick wok?

Helen: The uncoated is carbon steel without any coating except perhaps oil or a clear lacquer to help the pan from getting rusty during the time it would sit on a store shelf.

Carbon steel must be seasoned. This sounds like it might make food taste better but it doesn’t, it just keeps the pan from rusting. Takes a good 6 months of almost daily use for a wok to get really seasoned. If you like to season, get carbon steel. If you don’t plan to use your wok more than 3x a week, the oil you use to season it will eventually get tacky, attract dust, and it may rust. When people see rust, they may think they need a new one. Nope! All you need to do is clean the rust off and re-season. In a Chinese kitchen the wok is used daily, and often sits on the burner just waiting for the next meal to be made in it, so seasoning is not a problem.  If you live near the ocean a carbon steel wok may rust more easily due to the high moisture content in the air.

A non-stick wok comes in many varieties. High end, inexpensive, Teflon or not, plus there is non-stick for different purposes. A skillet has a different nonstick coating than a cake pan or stir fry pan. In a stir fry pan, food is stirred, unlike a skillet where things might just be turned a few times. The nonstick coating must be strong. For stir frying we also tend to use a higher heat and the pan must be able to take a higher temperature. For the woks from Helen’s Asian Kitchen we use the Excalibur® process, developed by Whitford, known as reinforced nonstick and it can take higher temperatures.

N: What do you use at home?

Helen: The 14″ and 12″ non-stick woks from the Helen’s Asian Kitchen line, depending on the food volume that I’m preparing. When cooking for a dinner party, or using a high volume ingredient like noodles, I use the 14” but when cooking for myself I use the 12.” It’s about personal preference.  There’s nothing wrong with carbon steel as long as your know it needs extra care.

N: Helen, for those that choose a carbon steel wok, how would you suggest they season the wok?

Helen: Wash in warm soapy water and scrub to remove any coating or food safe lacquer.  Then use vegetable oil, corn oil, but not butter or olive oil. Heat the pan and add a few tablespoons of oil. Heat it until the oil smokes. Then remove from heat, wipe off excess oil and allow to cool. Repeat.

N: What type of wok is best for a home chef that’s just exploring using a wok for the first time? And what type is best for an experienced chef, looking to invest in a high quality wok?

Helen: I would recommend a high quality non-stick pan coated with a premium non-stick coating like Excalibur. It’s not that expensive, but performs well. If someone prefers to season a pan, then go with carbon steel.

N: How long should a cook expect to keep a well-cared-for wok?

Helen: The pan I started with 7 years ago I still use today. For a well-cared for wok, it should last many years. Don’t put it in the dishwasher and don’t use metal tools that would scratch it.

N: Is there any special recipe that you like to cook in a wok that might surprise?

Helen: I make Italian bolognese sauce in my wok but instead of beef I use turkey. I make a large batch in the 14” wok. I sauté the meat, and brown onions in it. I use the 12” for risotto and also use it for French sautéing. For dessert I make Almond Brittle it the 12” wok.  I hang it on my pot rack and it’s one of the top 2 pieces of cookware I use in my kitchen at home.

N: What’s something that you remember watching your mom make in a wok? And do you make that same dish today?

Helen: Anything stir fry.

To learn more about Helen Chen’s cookbooks and recipes, visit http://www.helensasiankitchen.com/
See the Helen’s Asian Kitchen kitchenware line at:  http://www.hickitchen.com/helen-chens-asian-kitchen.aspx
Where to buy? http://www.hickitchen.com/where-to-buy.aspx
Interested in meeting Helen?  See Helen Chen’s Cooking class schedule

*Not affiliated with Joyce Chen Products

Biography of Helen Chen

Helen Chen

Helen Chen

Helen Chen is a widely acknowledged expert in Chinese cooking. Besides her role as an educator and cookbook author, she also is a product and business consultant to the housewares industry. In 2007 she created and developed a new line of Asian kitchenware under the brand name, “Helen’s Asian Kitchen,” expressly for Harold Import Company in New Jersey.

Having been born in China, and raised and educated in the United States, Helen brings the best of both worlds to her approach to the art of Chinese cuisine. She understands the needs of the American cook as only a native can, yet she is intimately knowledgeable with the culinary practices and philosophy of China.

Helen is the author of Helen Chen’s Chinese Home Cooking (Hearst Books,1994), Peking Cuisine (Orion Books,1997), Helen’s Asian Kitchen: Easy Chinese Stir-Fries (John Wiley & Sons, 2009) and Helen’s Asian Kitchen: Easy Asian Noodles (John Wiley & Sons, 2010). For more information, visit http://www.helensasiankitchen.com/

Straight Up Deviled Eggs from Elizabeth Karmel

It’s finally here, the official start to grilling season—although anyone who knows me, knows that I grill year ’round!  Still, Memorial Day is a great time to celebrate cooking outdoors.
I love creating a build your own burger bar when I cook for a crowd.  It’s easy on the cook (me!) and lots of fun for my company.  I make up a mess of patties in advance and simply fill the grill with them.  When they are done, I put them on a platter and they join the buffet of buns, topping and condiments that I have laid out.  Because there are so many fun and tasty ways to top the burgers, I always count on each person having two.  This is a real crowd pleaser.
The day before my cookout, I always make my Straight Up Deviled Eggs while I am getting all the burger toppings together.  The eggs actually taste better once all the  deviled flavors have had a chance to meld and marry in the fridge. Try presenting the eggs in my Grill Friends Porcelain Egg Crate.  It is functional and whimsical.  But note that you will need to cut the eggs across instead of lengthwise.

On the day of the party, all you have to do is fill the shells with the deviled mixture.  I love that all the hard work is done and I have more time to enjoy my party!

Elizabeth Karmel

Straight-up Deviled Eggs Recipe

These classic deviled eggs are summer on a plate and a welcome addition to an cookout!

1 dozen large eggs
⅓ cup Hellmann’s mayonnaise
2 tablespoons strong Dijon mustard
5 tablespoons unsalted butter, softened
Zest of ½ lemon
1 teaspoon fresh lemon juice
Pinch of garlic powder
2-4 shakes Tabasco
Sea salt to taste
Smoked Paprika or minced fresh chives for garnish

Place the eggs in a large stockpot and cover with cold water.  Bring to a boil, cover and turn off the heat.  Let sit 20 minutes.  Drain and run under cold water until eggs are cool to the touch.  Let sit another ten minutes.

Porcelain Egg Tray, part of Elizabeth Karmel's Grill Friends BBQ line. Made by HIC, Harold Import Co.

Porcelain Egg Tray, part of Elizabeth Karmel’s Grill Friends BBQ line. Made by HIC, Harold Import Co.

Peel eggs carefully, keeping whites in tact.  Cut in half across the middle and remove yolks.  Set whites aside in the Grill Friends Porcelain Egg Crate.  Break yolks up and mash with a fork until all large pieces are broken up and smooth.

Add mayonnaise, mustard, butter, lemon zest and juice, garlic powder and Tabasco.  Stir well.  Taste and season with sea salt.  Just before serving, place in a pastry bag or use a small spoon to fill egg white “boats” with “deviled” egg yolk mixture.  Sprinkle with smoked paprika for classic eggs, chives for a fancier-looking version.

Makes 24 deviled eggs

Looking for a juicy burger recipe? Check out Elizabeth Karmel’s Backyard Burgers. Try the Grill Friends Steakhouse Burger Press to make quick work of perfect patties.

Grill Friends Steakhouse Burger Press

Grill Friends Steakhouse Burger Press

Learn more about the Grill Friends line at http://www.hickitchen.com/elizabeth-karmels-grill-friends.aspx

Aunt Gina’s Lasagna – A Traditional Italian Recipe from the Fante Family of Philadelphia

Fante Family

Fante Family

Sunday Dinners: The Special Occasions. Contributed by The Fante family.

Since I was a little girl, Sundays were reserved for family.  Both my parents’ businesses – Fante’s (a kitchen wares shop) and Esposito’s (a butcher shop) in the Italian Market of Philadelphia both closed by 2PM in order to have mid-afternoon Sunday dinner.  Along with my sister and 3 cousins, we would spend the whole day at our Nonni’s (grandparents’) home:  going to church, helping cook dinner and playing together. My Nonna would wake up at the crack of dawn to chop all the vegetables for the gravy and start it simmering with the tomatoes which she would put through a food mill to create a uniform sauce.  She would then make the meatballs and sausage, fry them, and add them to the sauce, which would be simmering on low heat by the time my sister and I woke up and made it downstairs for our traditional chocolate chip pancake breakfast (we were totally spoiled).

Filled to the brim with pancakes, we would help her to make the pasta dough and leave it to rest, covered, while we went to church.  When we returned, we would continue to cook the sauce, allowing it to simmer while we rolled out the dough on the manual pasta maker.  All of the cousins took turns working the crank and catching the pasta – it was always at least a 2-cousin job.

Normal Sunday dinners meant fresh meatballs, sausage and gravy served with homemade pasta of some kind.  For special occasions like birthdays and holidays, we would do trays of lasagna. Nonna would supervise all of the extra tasks for making the lasagna, the most important being the fresh grated cheese.  We love cheese!  And did I mention our Sunday dinners included an epic amount of food?  Every week about 12 family members would join us around a table meant for 6, filled with enough food to comfortably feed 30.  These large trays of lasagna require a lot of cheese.  The older cousins were responsible to grate about a pound of parmesan and shred about 2 pounds of mozzarella.  We all proudly sported some scarred knuckles from the rasp we used [that we swear] she had brought with her from Italy.  It was torture.  She eventually replaced it with a large rotary grater which made the job so much easier!   It handled the volume, and it was simple to swap the drums for each cheese.  We could also all take turns since it didn’t require as much elbow grease or Band-Aids. We are so excited to have a new cousin (#6) – Nico!  We can’t wait for the day we can enlist his help to use the grater named after him to make some Sunday dinner lasagna. Here is the recipe for a smaller-portion of our lasagna.  We typically make it with just sauce and cheese. You can certainly substitute bought lasagna for the pasta portions and add meat to customize it to your family’s tastes.  You can also find many of our family recipes (as well as embarrassing family photos) included with the Fante’s line of products.  Buon appetito!

Aunt Gina of the Fante Family

Aunt Gina of the Fante Family

Aunt Gina’s Lasagna

Makes 6 to 8 servings
1 lb. homemade lasagna strips
1 lb. ground meat (beef, pork or mixture)
4 cups salsa marinara (recipe, scroll down)
16 oz. mozzarella, shredded
16 oz. grated cheese (parmigiano and pecorino)

1. Brown ground meat in a fry pan then drain off the fat. Place salsa marinara in a sauce pan, stir in browned meat and heat gently over a medium flame until it’s hot. Stir occasionally to keep it from sticking.

2. Meanwhile, roll pasta dough (scroll down for recipe) to desired thickness and cut into 2 ½” wide strips (Try Cousin Daniele’s Expandable Dough Cutter. Available at Fante’s)

Fante's Cousin Daniele's Expandable Dough Cutter

Fante’s Cousin Daniele’s Expandable Dough Cutter

3. Spoon hot meat sauce into the bottom of a 11” x 15” baking dish.

4. Place a single layer of lasagna strips into the baking dish, lengthwise. Layer with grated cheese (try Fante’s Papa Francesco’s Rotary Cheese Grater or Fante’s Cousin Nico’s Suction Base Cheese Grater, available at Fante’s)  and mozzarella then top with meat sauce. Repeat these steps for the second layer but place lasagna strips widthwise. Alternating the direction of the pasta strips will keep your lasagna from falling apart when it’s cut.

Fante's Cousin Nico's Suction Base Cheese Grater

Fante’s Cousin Nico’s Suction Base Cheese Grater

5. Repeat step 5 to make as many layers as you like. Finish by spooning more sauce on top and sprinkle with grated cheese. 6. Bake at 350°F for 45 minutes or until sauce and cheese are bubbling. Remove lasagna from the oven and let rest for 30 minutes before serving.

Grandma Nadia of the Fante Family

Grandma Nadia of the Fante Family

Grandma Nadia’s Pasta Dough

Makes 2 pounds of dough
2 eggs, at room temperature
4 cups unbleached all-purpose flour
4 to 8 ounces tepid water, as needed

1. Place flour on a wooden board, make a well and break the eggs into it.

2. If you prefer, you can mix it in a bowl with a fork or in an electric mixer with a dough hook.

Pasta Dough Step 1

Pasta Dough Step 1

NadiasPastaDoughStep2

Nadias Pasta Dough Step 2

3. Slowly incorporate the flour into the eggs. There should be just enough moisture so the ingredients stick together to form a smooth, elastic ball but not enough to stick to the table or bowl.

Pasta Dough Step 3

Pasta Dough Step 3

Nadias Pasta Dough Step 4

Pasta Dough Step 4

4. You may need to add a bit of water if the dough is too dry and crumbly, or a bit more flour if too wet and sticky.

5. Cover the dough with a clean towel and let it set for about 30 minutes.

6. Use a sharp knife to cut off a chunk from the ball (photo 4).

7. Flatten the chunk of dough with the heal of your hand then roll it out to the desired thickness with a floured rolling pin.

8. Proceed with Step 2 of Aunt Gina’s lasagna recipe instructions, above.

Attilio of the Fante Family

Attilio of the Fante Family

Attilio’s and Mariella’s Salsa Marinara – Marinara Sauce

Makes 1 quart (4 to 6 servings)
36-oz. can crushed tomatoes
5 cloves garlic, coarsely chopped (Try Fante’s Uncle Cristian’s Garlic Slicer and Grater, available at Fante’s)

Fante's Uncle Cristians Garlic Slicer and Grater

Fante’s Uncle Cristians Garlic Slicer and Grater

¼ onion, coarsely chopped
Olive oil Salt, pepper, and red pepper flakes to taste

1. Sauté garlic, onion and red pepper in olive oil. Remove them from the oil before they brown.

2. Add tomatoes.

3. Simmer for about 40 minutes.

4. After 15 minutes add salt and pepper to taste.

5. After another 30 minutes, check sauce for consistency; if too watery, leave lid off to reduce.

6. Stir often to avoid sticking, especially if the pot you’re using does not have a heavy bottom.

Buon appetito!


Asparagus Salad with an Asian Twist – A Recipe to Celebrate Spring from Helen Chen

Article contributed by leading Asian culinary expert, cookbook author, cooking instructor, and developer of Helen Chen’s Asian Kitchen® cookware and cooking supplies, Helen Chen.

Asparagus Salad

Asparagus Salad

I so look forward to spring.  Not only for the promise of warm weather and longer days, but also for the anticipation of fresh local produce.  What better harbinger of the coming seasonal bounty than asparagus.

In New England, we have a number of farms that grow this delectable vegetable, but in Western Massachusetts, the town of Hadley, crowned “The Asparagus Capital of the World,” is famous for it.  I don’t know if that moniker is still actually true, but here in Massachusetts we are used to hyperbole.  To us, Boston is “The Hub of the Universe!”

Asparagus fits beautifully into Asian cuisine where it is most commonly parboiled or stir fried.  One of my favorite (and easiest) asparagus recipes is a salad I learned from my mother.   She always made it when asparagus were in season.  It’s quick, incredibly easy and pairs deliciously with Asian or Western foods.  I make it all the time and have converted many friends with this recipe.

asparagus

When buying asparagus, look for bright green spears with tight crowns.  Anything limp, yellowed or wrinkled should be passed by.  I prefer spears that are at least ½” in diameter because I think the thicker spears are more tender and better tasting.   Be careful not to overcook the spears and remember to immediately plunge them into cold water after cooking to maintain that spring green color and tender-crisp texture.

Welcome spring to your table with this tasty asparagus salad.  Happy Spring!

Helen Chen

ASPARAGUS SALAD RECIPE

1 pound fresh asparagus

3 tablespoons soy sauce

1 teaspoon Asian sesame oil

1.  Cut or snap off the tough ends of the asparagus.  Wash well and cut on the diagonal into 1½-inch lengths.  (I like to use my incredibly sharp Ceramic Paring Knife)

2.  Bring 6 cups of water to a boil in a saucepan over high heat.  Add the asparagus pieces and as soon as the water returns to a boil, drain and quickly cool in cold water to stop the cooking.  Drain well.  (The asparagus may be cooked a day ahead and refrigerated)

3. Just before serving, place the asparagus in a serving dish and toss with the soy sauce and sesame oil.  Serve at room temperature.

COOL TOOL TIP: 

Among my (and just about every professional chef’s) favorite and frequently used tools for straining are my “Spider” skimmers and basket.  They are affectionately called “spiders” because of the “web” of hand-woven stainless steel wire that make up the basket.  They drain incredibly fast and thoroughly.  Even better than a colander!

Spider Strainer Basket

Spider Strainer Basket

With the Spider Strainer Basket, simply fill it with the asparagus pieces and place the whole basket into the boiling water. Convenient hooks on the handle allow the basket to be attached to the side of the pot.  When the asparagus are done just lift the basket out of the hot water and rinse under cold water in the sink. See where to find a Spider Strainer Basket near you.

Would you like to meet Helen? See Helen Chen’s Cooking class schedule.

Copyright © 1994 and 2013 by Helen Chen.  All rights reserved.

Biography of the Author, Helen Chen

Helen Chen

Helen Chen

Helen Chen is a widely acknowledged expert in Chinese cooking. Besides her role as an educator and cookbook author, she also is a product and business consultant to the housewares industry. In 2007 she created and developed a new line of Asian kitchenware under the brand name, “Helen’s Asian Kitchen,” expressly for Harold Import Company in New Jersey.

Having been born in China, and raised and educated in the United States, Helen brings the best of both worlds to her approach to the art of Chinese cuisine. She understands the needs of the American cook as only a native can, yet she is intimately knowledgeable with the culinary practices and philosophy of China.

Helen is the author of Helen Chen’s Chinese Home Cooking (Hearst Books,1994), Peking Cuisine (Orion Books,1997), Helen’s Asian Kitchen: Easy Chinese Stir-Fries (John Wiley & Sons, 2009) and Helen’s Asian Kitchen: Easy Asian Noodles (John Wiley & Sons, 2010). For more information, visit http://www.helensasiankitchen.com/

*Not affiliated with Joyce Chen Products

The Pleasures of the Pomegranate and an Investigation of The Pomegranate Tool

Pomegranate Seeds
One of the first cultivated fruits, the pomegranate offers a unique, sweet-sour taste that is ideal for nibbling on alone or incorporating into cooling drinks, vegetable salads, tart stews, soups and desserts.

The pomegranate boasts high levels of antioxidants in the form of polyphenols, tannins and anthocyanins, all designed to help you stay healthy and strong by fighting those free radicals that can cause certain diseases – and premature aging.

But, getting to the heart of the pomegranate and those tiny seeds (called arils), which are the key to those antioxidants, can be a bit frustrating. The arils, which are surrounded by a shiny, tough, white membrane, can be hard to remove — and often quite messy, Working ones way though the ruby juice and seeds can be an act of devotion – an act that might cause one to throw up their hands and give up. But don’t give up on the delicious taste, versatility, and healthfulness of the pomegranate just because you think it is too much work.

It is often suggested to submerge a halved pomegranate in water in order to more easily remove the arils, and more importantly,  prevent splatter of the ruby red juices. But, I find this still a bit messy and also a bit cumbersome.

The new Pomegranate Tool is a quick, clean and easy way to remove those sometimes stubborn arils.

Here’s how it works: To start off, roll the pomegranate on the work surface to loosen and soften the fruit. Then remove the crown and cut the fruit in half. Place the halved pomegranate  face down in the grid, and cover it with the flexible dome, holding the dome tightly against the bowl.

Pomegranate Tool Pom Face Down

Winner of the Fruit Logistica Innovation Award

Pomegranate Tool Cover onPomegranate Tool With Spoon

To remove the seeds, strike the dome firmly, using a heavy spoon. (The arils will be deposited into the bowl beneath.) If any of the membrane breaks free, it can be easily picked out from the bowl of arils.

Pomegranate De-SeededPomegranate Arils

If desired, rinse the seeds first, and then enjoy.

The three-piece set, which includes the dome, grid and bowl, is easy to clean by hand or in the dishwasher.

Pomegranates are typically available in the fall and early winter. For maximum flavor, look for fruits that are rich in color and are heavy, as they will hold more juice. If, when pressed, powdery cloud puffs emerge from the crown, the fruit is most likely dry. You probably will eat them immediately, but if you must store them, keep them whole in the refrigerator for up to three months. The seeds, when stored in an airtight container in the freezer, can also be kept for three months. Find a Pomegranate Tool to take home, here.

See The Pomegranate Tool demonstration from the HIC booth, at the International Home + Housewares Show.

Versatile and Tasty These little gems are great on their own as a snack, tasty when added to yogurt or granola, and a sweet addition on top of ice cream or salads. They add texture, color and a burst of flavor to just about anything you add them to.

Here are a few suggestions on how to enjoy pomegranates:

  • Add some pomegranate juice to maple syrup
  • Add the arils to squash risotto
  • Reduce balsamic vinegar, spike it with a few tablespoons of  pomegranate juice and then drizzle over salmon
  • Create a sweet salsa with jalapeno, yellow pepper, rice vinegar and the pomegranate arils
  • Design a few ‘adult’ beverages including a Pomegranate Caipirinha or Pomegranate Cosmo
  • Incorporate the arils and juice into a delicious Pomegranate Yogurt Dip
  • Add a bit of acidity to a meat or fowl sauce

Once you’ve started eating them, it’s hard to get out of the pomegranate habit. And, the Pomegranate Tool is a handy way to help you enjoy all the flavor and goodness without the struggle.

Laura Everage is a writer, editor, swimmer, yoga-lover, wife, and mother of four. Her days start very early in the morning, but thanks to her favorite beverage, coffee, she is able to start each day on a good note. Laura began her journey in all things food and beverage related nearly 20 years ago, as Managing Editor of The Gourmet Retailer. She continues to write about food, coffee, tea and kitchenware and is currently working on a book entitled Courage in a Cup: Women, Coffee and the Global Economy. Laura is also founder and editor of her own website, Family Eats, and is editorial director/partner of Coffee Universe. Her work has appeared in a variety of trade magazines as well as consumer publications Saveur and Consumers’ Digest. Laura’s knowledge of the industry has landed her appearances on both the Food Network and Fine Living Network. To contact Laura, email Laura@familyeats.net.

Clams in Black Bean Sauce – A Recipe to Celebrate Chinese New Year, 2013… Year of the Snake

Article written by leading Asian culinary expert, cookbook author, cooking instructor, and developer of Helen Chen’s Asian Kitchen® cookware and cooking supplies, Helen Chen. For full Bio, please see below…

Clams in black bean sauce

Clams in black bean sauce

February 10, 2013 ushers in the new Year of the Snake. The exact date of Chinese New Year, or Spring Festival, as it is commonly known in China, is determined by the phases of the moon. The Chinese lunar calendar is one of the oldest chronological records in history.

Chinese New Year is a time for grand celebrations and in China almost one billion people are on the move. It’s the one time in the year that everyone tries to journey to their respective hometowns for family reunions and banquets. I always suggest to tourists not to even think about visiting China during the New Year festivities. You won’t be able to buy a train, plane or boat ticket. It will be that busy and chaotic.

In the days preceding New Year the house must be cleaned, all debts settled and the house decorated with good luck symbols and signs. It’s considered unlucky to sweep or cut your hair during Chinese New Year because you’d sweep away good fortune and since the Chinese word for “hair” is a homonym for prosperity, the last thing you want to do is to cut your wealth in half.

Good luck couplets are written on scrolls of red paper and hung on either side of the front door. Flowers also play an important part in the New Year celebration. It’s traditional to have a bowl of fragrant narcissi that have been forced to bloom just in time for Chinese New Year. Paper whites or narcissi are symbolic of good fortune and prosperity. I have my narcissi in bloom right now!

With any Chinese festival, especially one as old and significant as the Chinese New Year, food always plays a large part in the celebration. For the Chinese, they are either eating or talking about food!

Lucky foods are prepared and served throughout Chinese New Year especially on New Year’s Eve when the whole family congregates for their new year banquet. Sticky rice to symbolize the “sticking together” of family and friends; whole fish to symbolize abundance; deep-fried spring rolls that resemble golden bars of gold; stir-fried clams in their shells look like silver ingots of old China; long noodles for long life; juicy Mandarin oranges to signify good luck; red apples not only for their lucky red color, but also because the word for apple, “ping guo” sounds like the word “ping” for peace; peaches for longevity; and peanuts, known as the long life nut. The list goes on and on.

Let me be the first to wish you all a very happy, healthy and prosperous New Year!

Helen Chen

A Chinese New Year Recipe- Clams in Black Bean Sauce

Serves 2, or 4 as part of a multicourse meal
12 littleneck or cherrystone clams (about 2 pounds)
2 garlic cloves, lightly crushed and peeled
2 slices unpeeled gingerroot
1 scallion, green and white parts, cut into 1-inch lengths, bulb split
3 tablespoons fermented black beans, coarsely chopped
1 fresh Thai chili, thinly sliced, optional
2 tablespoons dark soy sauce
1 tablespoon dry sherry
2 teaspoons sugar
2 tablespoons canola oil
2 teaspoons cornstarch, dissolved in 1 tablespoon water
Cilantro springs, for garnish

1. Cover the clams with fresh cold water and soak for about 30 minutes. Scrub the
shells with a stiff brush and rinse thoroughly to remove all sand and grit. (Here’s an in-depth clam cleaning guide for more tips and pictures)
Remember the shells and all will cook in the sauce and you don’t want it to
become gritty. Drain. Set aside. If not cooking right away, place in the
refrigerator.

2. Combine the garlic, gingerroot, scallion, black beans and chili, if using in a small dish. Set aside. Combine the soy sauce, sherry sugar and ½ cup water in another dish. Stir until the sugar is dissolved. Set aside.

3. Pour the oil into a wok or stir fry pan (you might try Helen’s 14″ Carbon Steel Flat-Bottom Wok if you haven’t settled on a wok yet) and place over high heat. Add the black bean mixture to the pan and stir until fragrant. Add the clams and stir for about 30 seconds. Add the soy sauce mixture, stir to mix, and cover the pan. Cook over medium heat for about 5 minutes, or until the clams just open. Stir occasionally for even cooking.

4. Remove the lid and thicken the sauce with the cornstarch slurry. When the sauce has thickened, transfer the clams to a serving platter and garnish with cilantro. Serve immediately.

Copyright © 2005 and 1994 by Helen Chen. All rights reserved. Reprinted from Helen Chen’s Chinese Home Cooking, New York, William Morrow & Co., 1994.

Biography of the Author, Helen Chen

Helen ChenHelen Chen is a widely acknowledged expert in Chinese cooking. Besides her role as an educator and cookbook author, she also is a product and business consultant to the housewares industry. In 2007 she created and developed a new line of Asian kitchenware under the brand name, “Helen’s Asian Kitchen,” expressly for Harold Import Company in New Jersey.

Having been born in China, and raised and educated in the United States, Helen brings the best of both worlds to her approach to the art of Chinese cuisine. She understands the needs of the American cook as only a native can, yet she is intimately knowledgeable with the culinary practices and philosophy of China.

Helen is the author of Helen Chen’s Chinese Home Cooking (Hearst Books,1994), Peking Cuisine (Orion Books,1997), Helen’s Asian Kitchen: Easy Chinese Stir-Fries (John Wiley & Sons, 2009) and Helen’s Asian Kitchen: Easy Asian Noodles (John Wiley & Sons, 2010). For more information, visit http://www.helensasiankitchen.com/

*Not affiliated with Joyce Chen Products